
# AI desk Pro Webchat configuration guide
# Overview
The Webchat is a conversational interface that can be integrated into your website, allowing users to interact with a chatbot in real-time. With its customization and security features, it adapts to your business needs and enhances the user experience.
This section walks you through configuring and installing your Webchat, detailing each step:
- Access and configuration: Setting up features and customizing the design.
- Security: Managing access and authorized URLs.
- Installation: Integrating the script into your site.
- Usage: Interacting with the chatbot and handling responses.
Follow these steps to ensure a smooth setup and provide an optimal conversational experience for your users.
# 1. Accessing the Webchat
To start configuring your Webchat:
- Navigate to the "Configuration" tab in your administration interface.
- Click on "Webchat" in the menu to open the configuration options.
# 2. Configuring the Webchat
Once the Webchat is selected, you will have access to four configuration tabs:
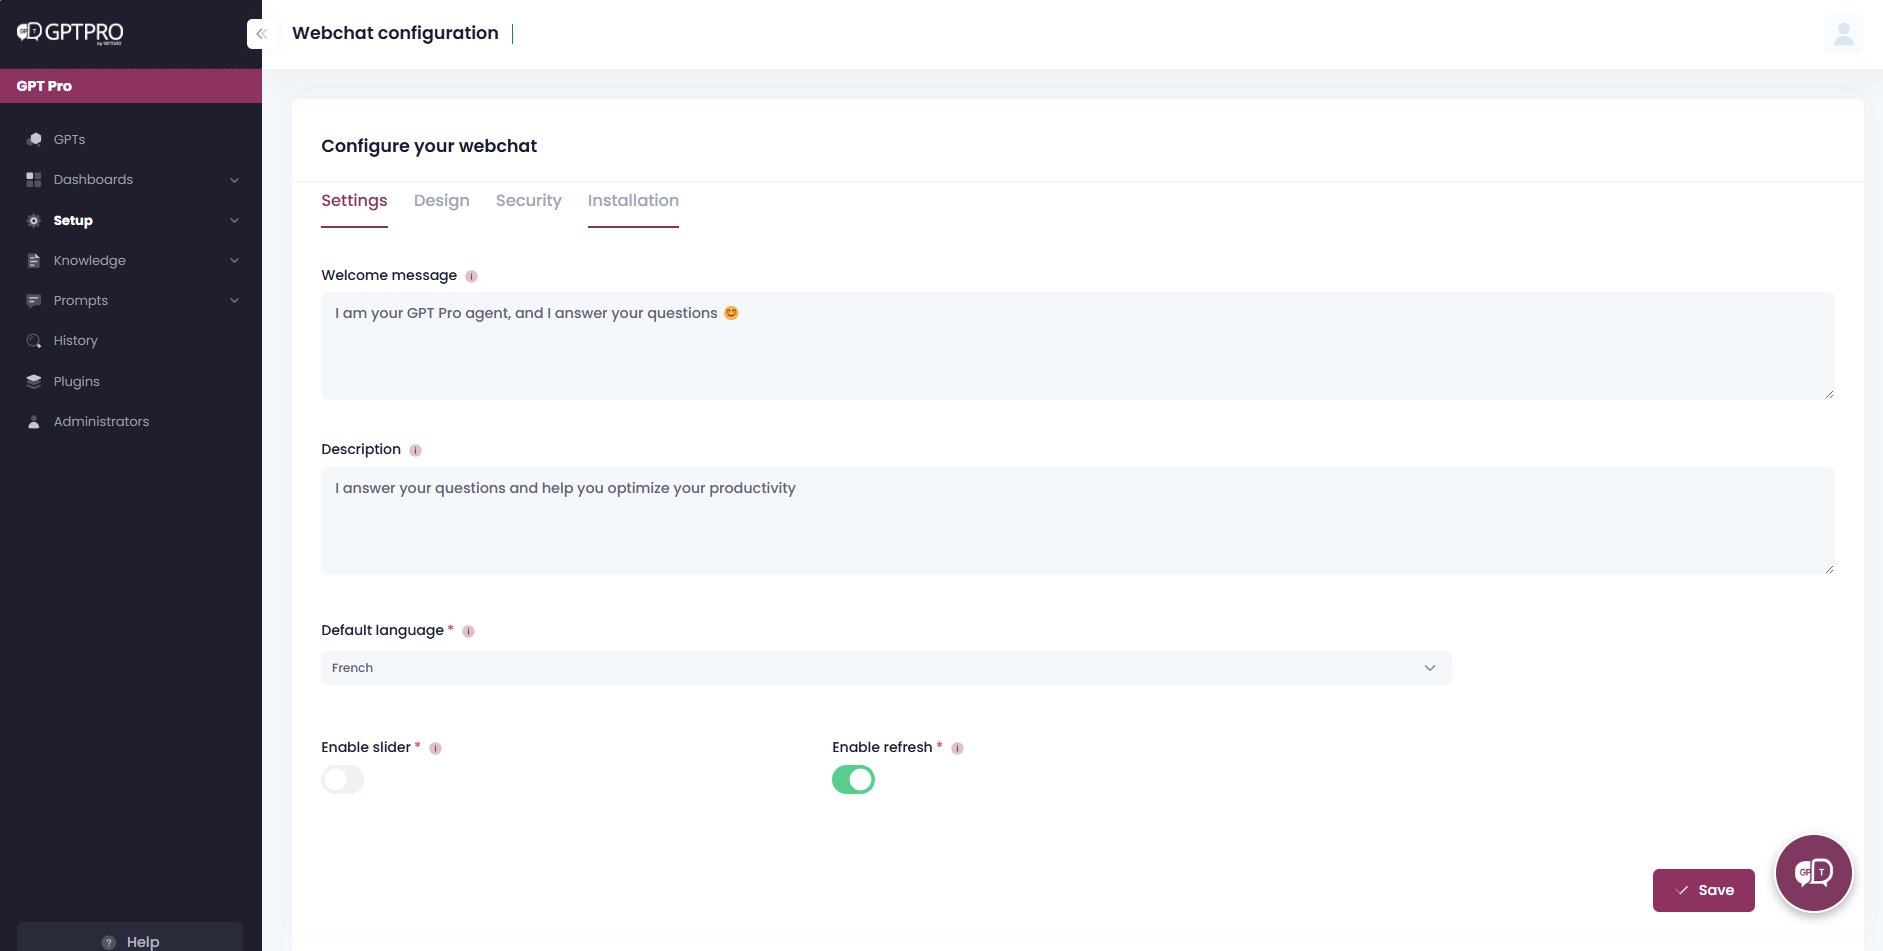
- Settings: Customize messages and features.
- Design: Adjust the appearance.
- Security: Manage access and authorized URLs.
- Installation: Get instructions for integrating Webchat into your site.
# 2.1 Configuring Webchat settings
In the Settings tab, you can customize the Webchat’s behavior.
Content Customization
- Welcome message: Maximum 500 characters
- Webchat description: Maximum 300 characters
- Default language:
- Defines the display language and chatbot response language.
Feature Activation You can enable or disable the following features:
- Slider mode: Webchat opens in full-screen mode.
- Refresh option: Allows users to manually refresh the Webchat.
Once your modifications are complete, click "Save" to apply them.
# 2.2 Customizing appearance (Design)
In the Design tab, you can personalize the Webchat’s look to match your website.
Customization Options
- Colors: Use the palette to define your colors.
- Webchat dimensions:
- Minimum width & height: 300 x 400 pixels
- Webchat button dimensions:
- Minimum size: 50 x 50 pixels
- Display mode:
- Open by default / Closed by default
- Positioning:
- Vertical alignment: Top / Bottom
- Horizontal alignment: Left / Right
After customization, click "Save" to store your settings.
# 2.3 Configuring security
Use the Security tab to protect Webchat access and control how it is used.
Security Settings
- API Key:
- Enter your API key to secure exchanges with the chatbot.
- Authorized URLs:
- Add your authorized website URLs using copy/paste (CTRL+C / CTRL+V).
- You can add or remove URLs as needed.
Click "Save" to apply security restrictions.
To apply the Webchat to all site pages, add the following to the end of the URL:
(\/[\S]*)?
Force authentication option: a new toggle "Force user authentication" is available.
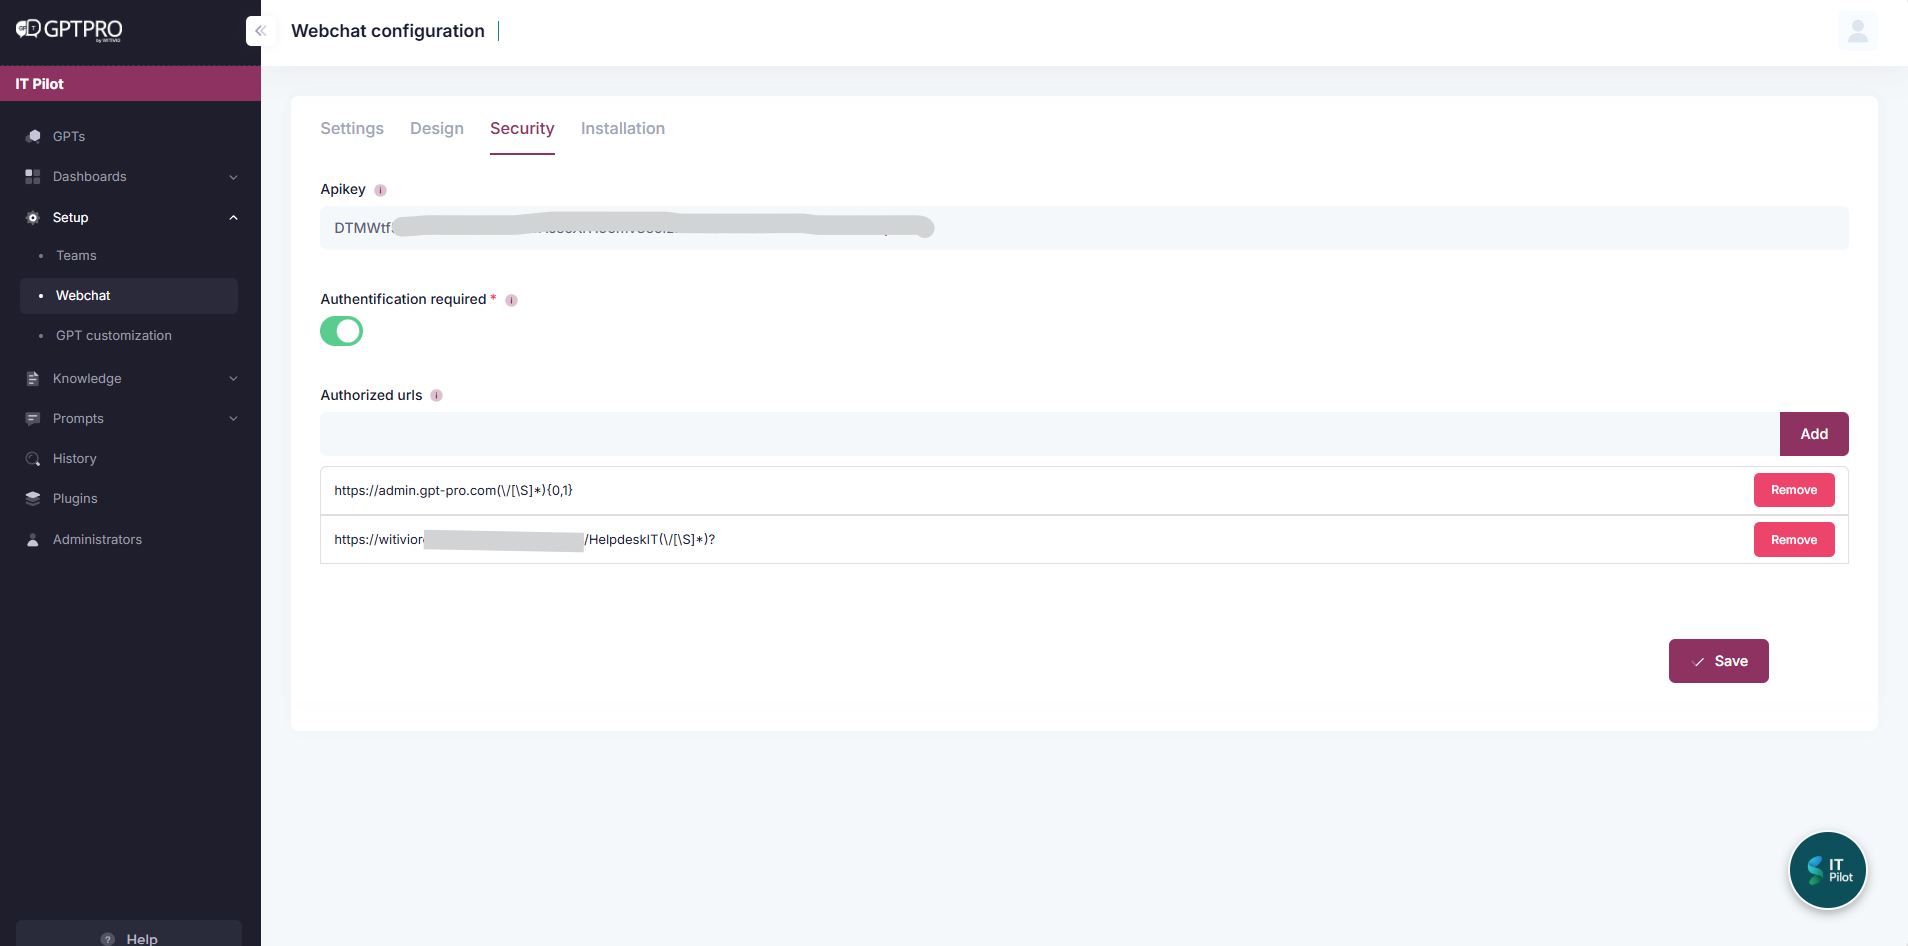
- When deactivated (default mode), the Webchat remains accessible in anonymous mode.
In this case, users cannot access SharePoint documents, SharePoint pages, or any APIs requiring authentication, since no user identity is established.
Once your modifications are complete, click "Save" to apply them.
- When activated, users must sign in with their Microsoft 365 account before accessing the Webchat.
This option enables secure, tenant-based authentication, identical to the model already active on Microsoft Teams.
# 2.4 Installing Webchat in a web part on a website
The Installation tab holds the script you need to integrate Webchat into your site.
Installation instructions
- Copy the provided script.
- Paste it into your website (inside a web part or another suitable location).
- Make sure your site's URL is authorized in the Security tab.
# 2.5 Installing Webchat in SharePoint
To integrate Webchat into SharePoint, add a personal app in SharePoint:
Step 1: Add custom apps in SharePoint
- Ask Witivio for the app package if you need the version without authentication. For the new version that includes authentication support, download the AI desk Pro Webchat SharePoint package (.sppkg) (opens new window).
- Go to More features in the SharePoint admin center (opens new window), and sign in with an account that has admin permissions for your organization.
- Under Apps, select Open.
- On the Manage apps page, select Upload, and browse to the app you want to upload, or drag the app into the library. SharePoint Framework solutions have the file name extension .sppkg.
- Review the information in the Enable app panel. Depending on the functionality that the app provides, the developer can set a flag that allows you to add the app to all sites in the organization. To do this, select Enable this app and add it to all sites. Make custom apps available with the SharePoint app catalog (Microsoft Learn) (opens new window)
To use the "AI desk Pro Witivio" component, follow these steps:
Step 2: Access the SharePoint page
- Sign in to your SharePoint workspace.
- Navigate to the page where you want to add Webchat.
- Click "Edit Page" (top right).
Step 3: Add the web part at the top of the page
- Place your cursor at the top of the page to add the web part in the correct location.
- Click the "+" button to insert a new element.
- In the window that opens, click "More WebParts" at the bottom.
- In the search bar, type "AI desk Pro Witivio".
- Select "AI desk Pro Witivio" and add it at the top of the page.
Step 4: Configure the web part
- Click the web part to open its settings.
- Click "Edit Properties".
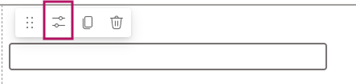
- A dialog appears.
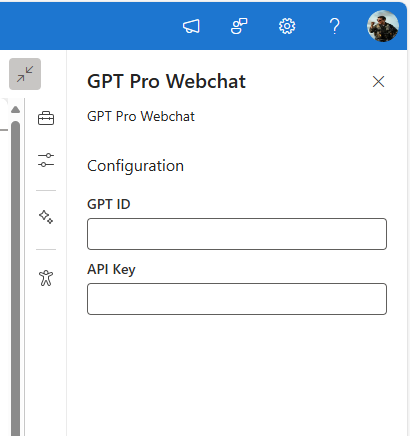
- Enter the Agent ID, which you can find in the URL of the AI desk Pro Admin Center.
- Enter the API Key from AI desk Pro:
- Go to Configuration > Webchat > Security and copy/paste the API Key.
Step 5: Save and publish
- Click "Apply" to save the changes.
- Click "Publish" to activate Webchat on the page.
# 3. Using the Webchat
Once installed, here’s how users interact with Webchat.
# 3.1 General functionality
- Click the Webchat icon to open or close it.
- The welcome message appears immediately.
- Type your message in the input field.
- Send the message by clicking the "Send" button or pressing "Enter".
- The chatbot responds instantly.
# 3.2 User interface
When the Webchat is open, several elements are visible:
- Welcome message (at the top of the window).
- Webchat description (if configured).
- Refresh button (if enabled in settings).
- "-" button to close the Webchat.
# 3.3 Receiving chatbot responses
When the chatbot responds, the user sees:
- A message generated by the chatbot or retrieved from the knowledge base.
- An interactive card with options:
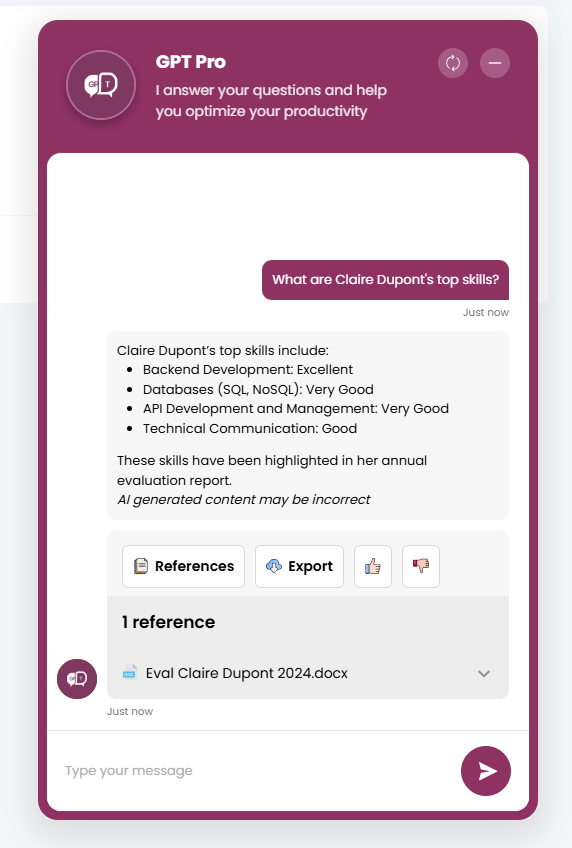
"References" button
- Click to view the response source.
- Expand the reference for more details by clicking the chevron.
- Click on the reference to open the associated document (local document or SharePoint).
If authentication is active, SharePoint links and API results are accessible according to the user's permissions.
"Export" button
- Choose between Excel and Word formats to download the response.
User feedback
- Click the thumbs-up for positive feedback.
- Click the thumbs-down for negative feedback (comment required).
# 3.4 How answers are built
Every answer starts from the knowledge base of the agent: the local documents, the SharePoint sources, and the Q&A entries indexed for it. A few behaviors are worth knowing when you review answers with your users.
Fallback to Web Search when the knowledge base is weak
When the knowledge base returns nothing relevant, or when the best match is only marginally relevant, the agent is now steered toward the Web Search tool instead of answering from weak document extracts. This only happens when Web Search is genuinely usable for that agent, which requires all three of the following:
- Web Search is enabled on the agent (see Web Search).
- Your subscription plan includes the Web Search feature.
- A search provider is configured for it.
If any one of these is missing, the agent stays inside your knowledge base and never reaches for the open web. Turning Web Search off is therefore enough to keep every answer sourced from your own content.
Long questions are split before the search
Long, multi-topic questions are now split into several focused sub-queries before the agent searches your documents, with the goal of improving relevance on complex questions. Short, single-topic questions keep their previous behavior. This happens automatically, there is no setting to change, and if the split cannot be applied the agent falls back to a single search.
References are no longer dropped
Reference handling is now shared by all chat surfaces, and a source retrieved for an answer is kept in the reference list even when the model does not mention it in its written response. You should see fewer answers where the References button is missing a source that was actually retrieved.
The context sent to the model is capped per model
The volume of retrieved content and conversation history sent in a single turn is capped according to the model serving the agent. See AI Models and Terms for what this means per model.
# 4. Best practices
Here are some best practices to optimize your Webchat experience:
- Before installation, make sure your site's URL is added in the Security tab in the AI desk Pro Admin Center.
- Customize the design to match your brand identity.
- Monitor user feedback to continuously improve the experience.
- Enable authentication if your chatbot interacts with sensitive or user-specific data (SharePoint libraries, pages, or APIs).
# 5. Security
# 5.1 Current authentication mode
The Webchat currently operates in Anonymous mode. This means we do not collect any identifying information about the user interacting with the agent.
- Consequence: it is not possible to perform API calls that require user authentication.
- Answer sources: the bot’s answers rely exclusively on:
- Local documents indexed in the knowledge base → Manage documents
- Q&A (Knowledge Base) entries configured in the editor → Q&A Editor
# 5.2 New authentication support
The Webchat now supports Microsoft 365 authentication (SSO), the same model already active on Microsoft Teams.
When enabled:
- Users sign in with their Microsoft 365 account.
- AI desk Pro applies the same permissions as Teams or SharePoint
- AI desk Pro can now fetch user-specific information via API or query SharePoint (libraries and pages) according to their rights.
Prerequisites:
- Activate the "Force user authentication" toggle.
- Install the new SharePoint package.
- Communicate to Witivio Support:
- The main SharePoint domain (for example, yourcompany.sharepoint.com)
- The main website domain (for example, www.yourwebsite.com)
# 5.3 Domain allow-listing
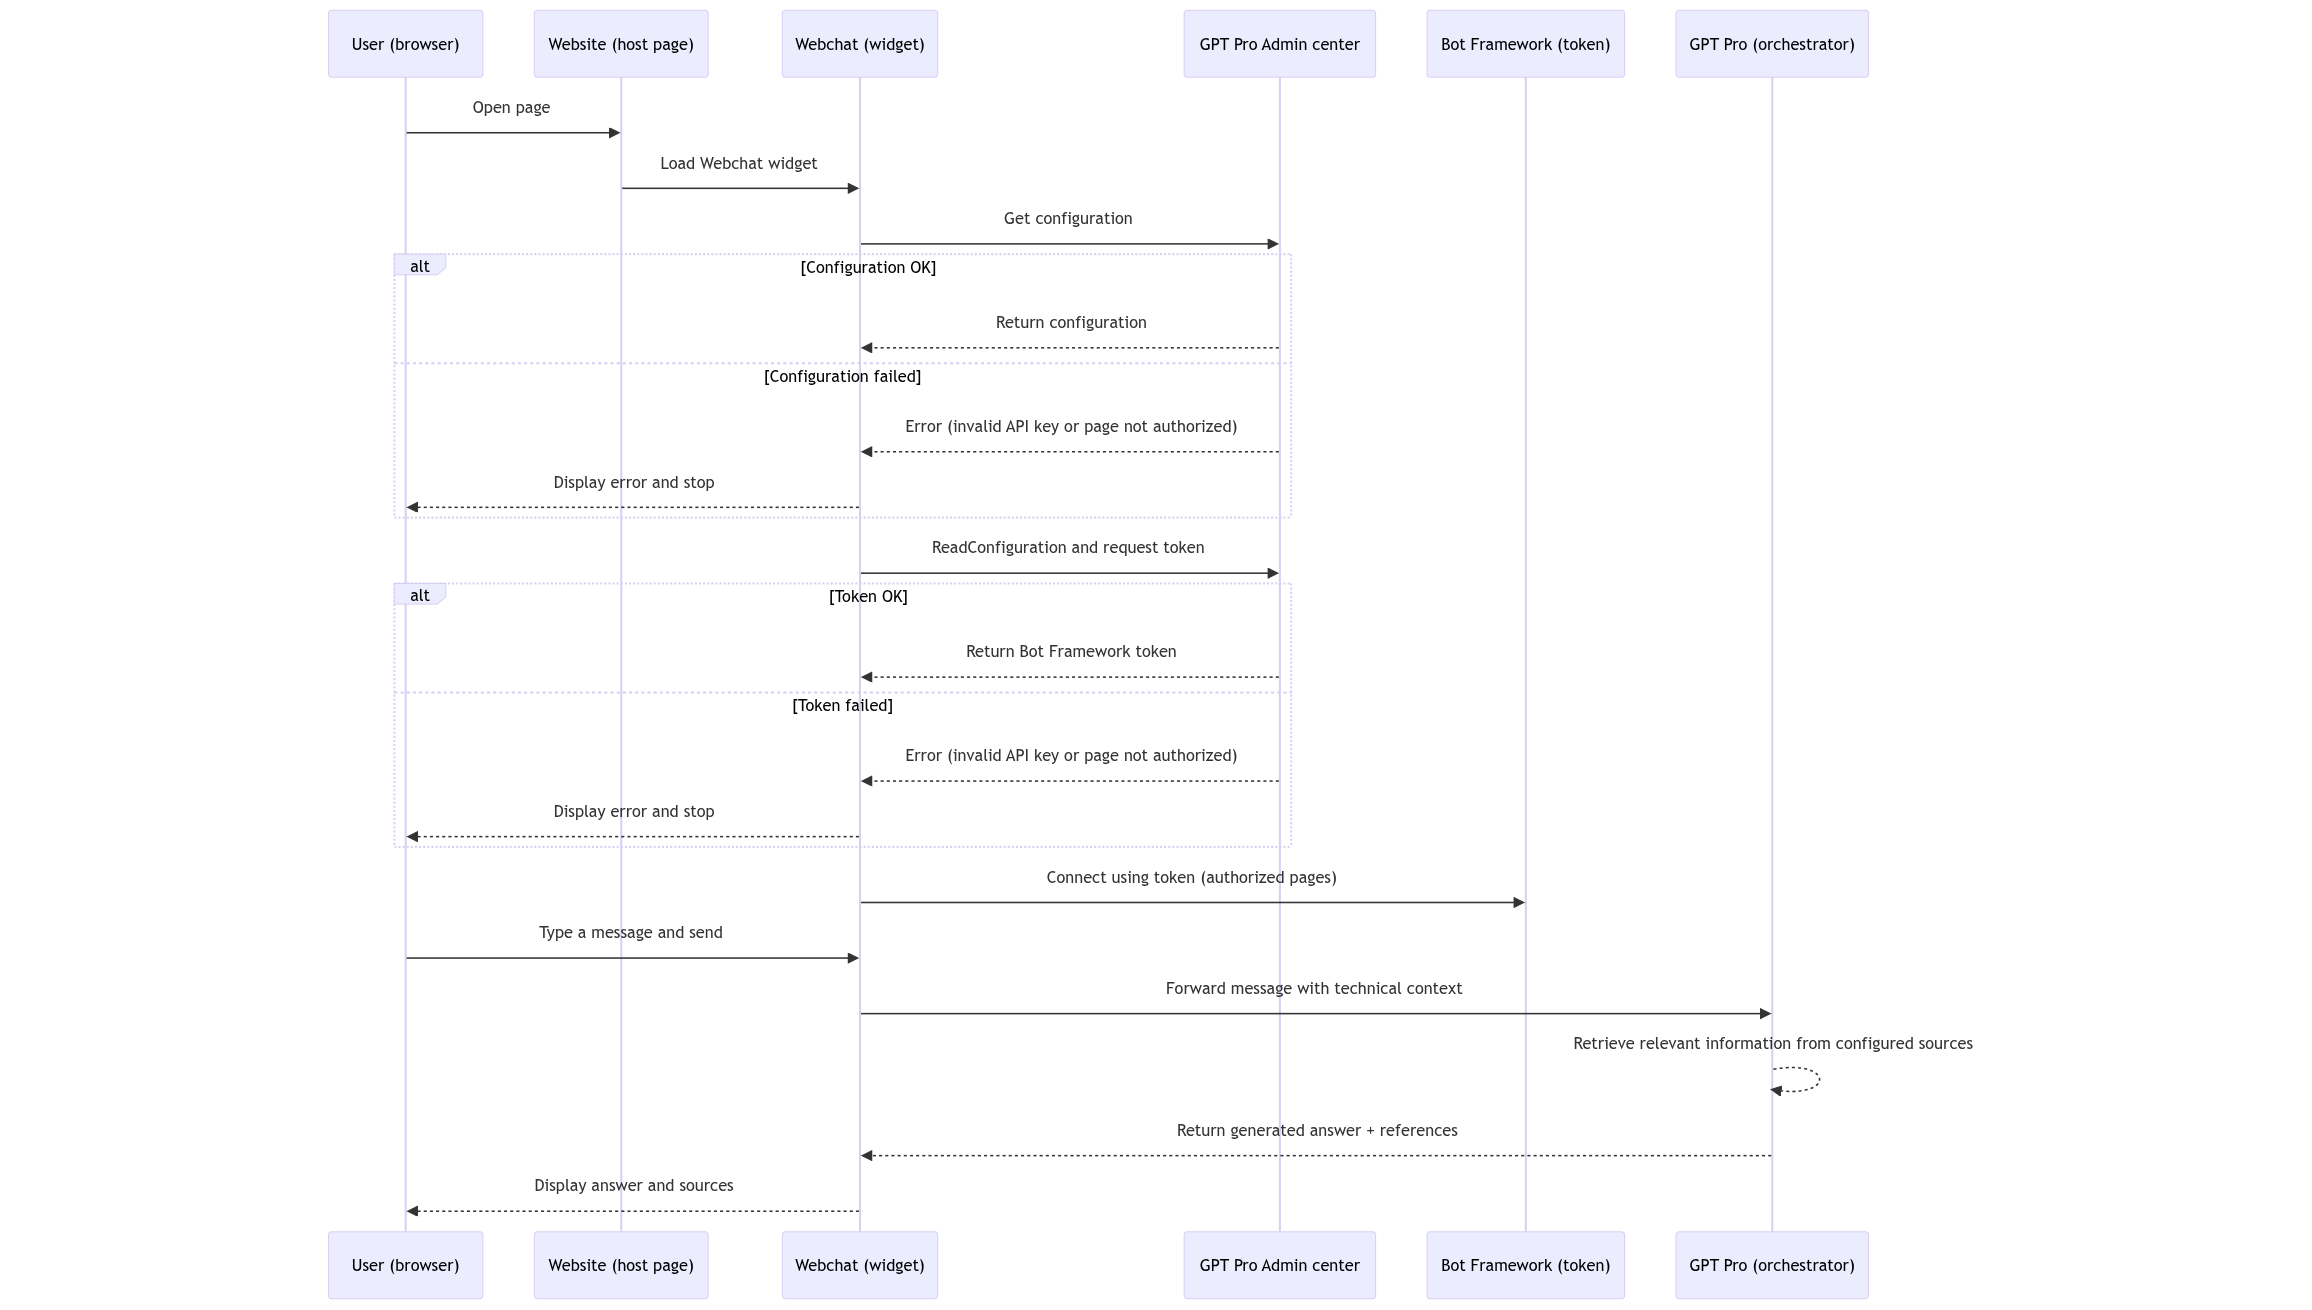
All Webchat traffic goes through a Bot Framework token. This token can only be generated from authorized pages defined in AI desk Pro configuration (see 2.3 Configuring Security). Make sure to add every domain where the Webchat is embedded.
# 5.4 Flow diagram (message sending)
# 5.5 Network prerequisites (firewall / proxy)
The embedded Webchat runs in your end-users' browsers, so their network must be able to reach the AI desk Pro and Bot Framework services. If your organization uses a web-filtering gateway or proxy, add the following domains to its allow-list (outbound HTTPS, including WebSocket):
*.aidesk-pro.comand*.gpt-pro.com: the Webchat script, configuration and Bot Framework token endpoints.*.botframework.com: the Direct Line channel used to exchange messages (includes a WebSocket connection).login.microsoftonline.com: only when the "Force user authentication" (Microsoft 365) option is enabled.
…:8015/warn?… "coaching"/block page) instead of the expected response. This interrupts the chat connection and can cause errors in the browser console even though the agent itself is operational. When troubleshooting a Webchat that loads but fails to connect, check your proxy logs for these domains first.