
# Synchronize Calendar Pro
Synchronization keeps Calendar Pro in step with your other calendars. You can copy your Calendar Pro events into your personal Outlook, pull external calendars into Calendar Pro, share your calendar out through an .ics link, and connect Outlook with Power Automate. This page walks you through each option.
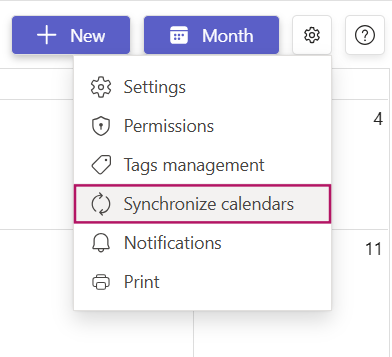
All synchronization options live in one place. To open the sync panel, click the Settings ⚙️ button next to the view selector, then select Synchronize Calendars.
# Sync Calendar Pro to your personal Outlook
Copy your Calendar Pro events into your own Outlook calendar. After you give consent, the sync runs automatically.
- 1
Open the sync panel, then select the personal Outlook synchronization option.
- 2
Turn on Enable synchronization.
- 3
Select I authorize to access to my personal calendar to grant Calendar Pro consent to your personal Outlook calendar.
Once you authorize access, the synchronization is automatic and Calendar Pro copies your events for you. No further action is needed.
# Subscribe to an external calendar with an .ics link
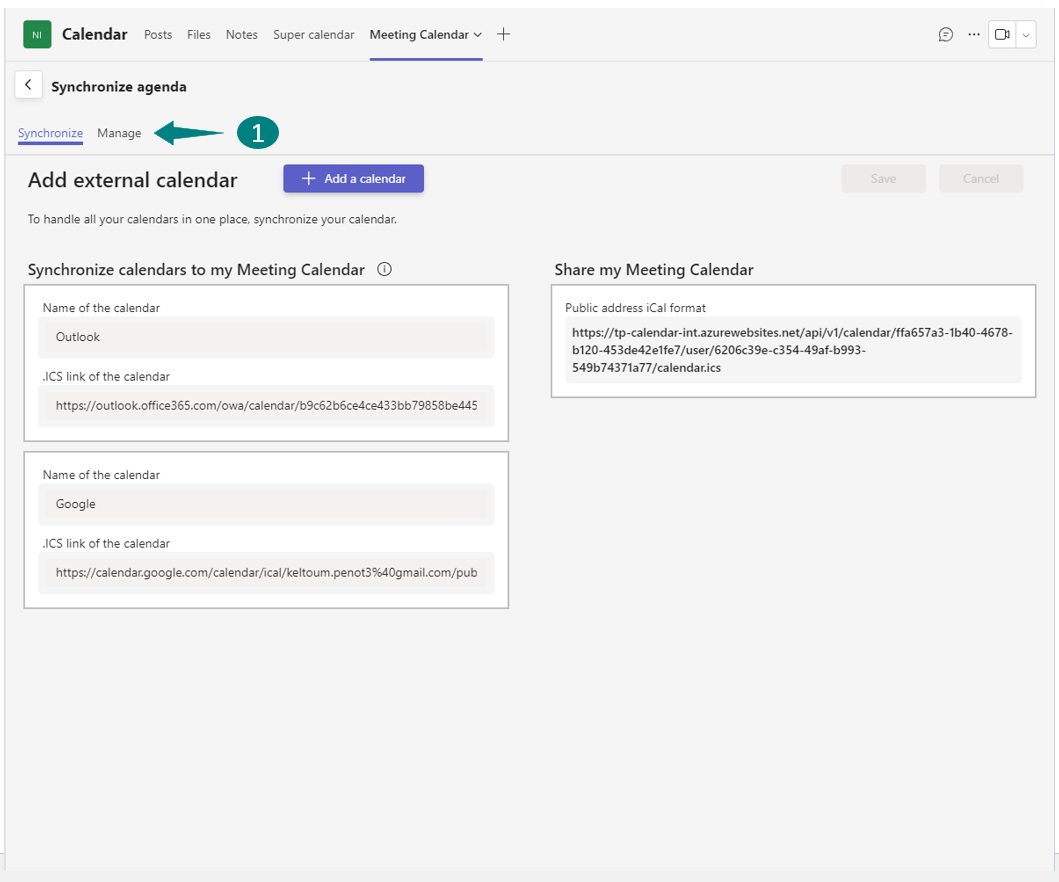
Bring an Outlook or Google Calendar into Calendar Pro so its events show alongside your own.
- 1
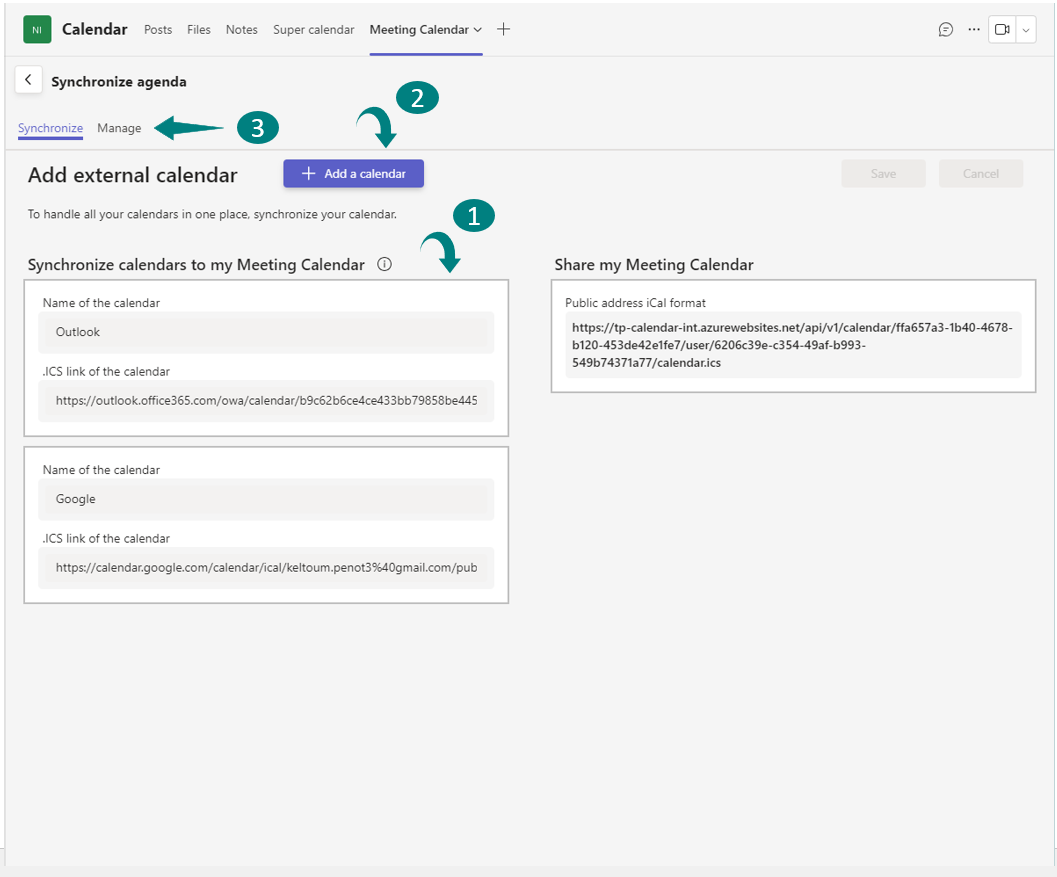
In the sync panel, go to the import area.
- 2
Enter a name for the calendar you want to add.
- 3
Paste the .ics link from your Outlook or Google Calendar. To find it, open that calendar, select it, and copy its .ics link.
- 4
To add more calendars, click Add Calendar. A new field appears for each one, up to three calendars.
- 5
Click Save to apply your changes.
Open the Manage tab to set colors and sharing for each calendar you add.
# Export Calendar Pro to another calendar
Share your Calendar Pro events into another Calendar Pro, Outlook, or Google Calendar.
- 1
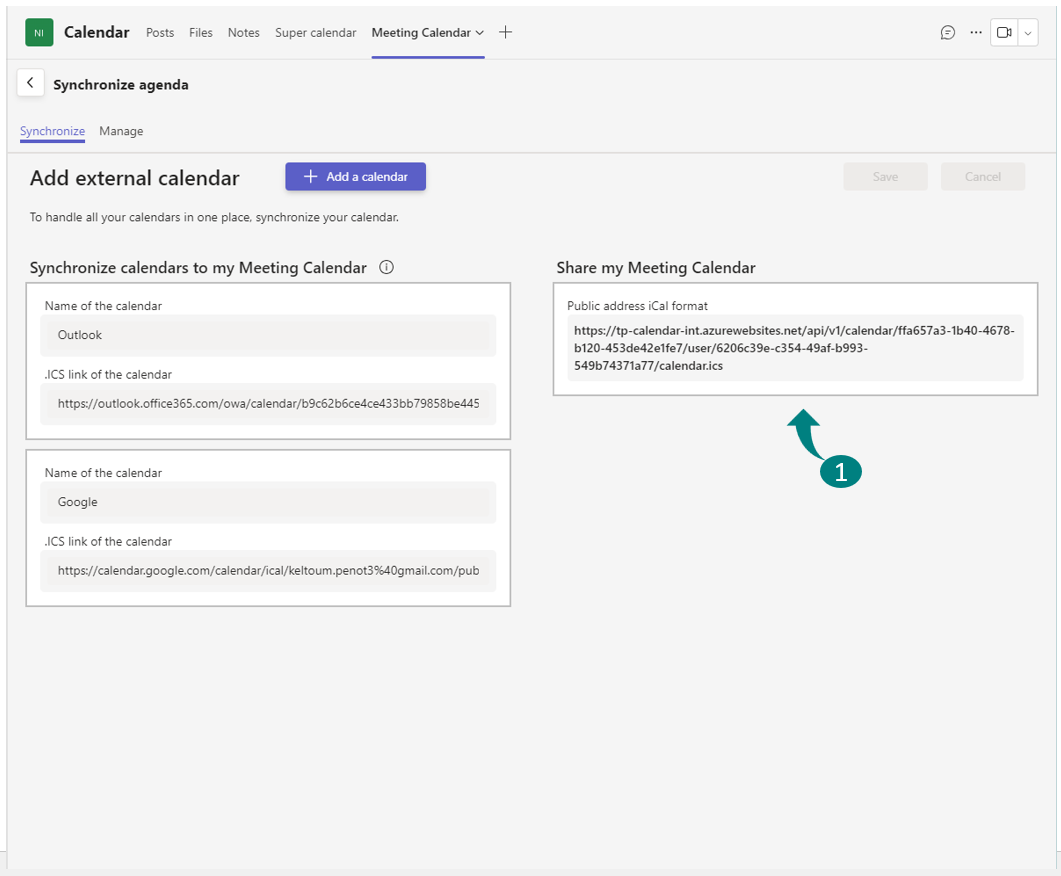
In the sync panel, go to the export area.
- 2
Copy the .ics link for your Calendar Pro calendar.
- 3
Paste the link into your other Calendar Pro, Outlook, or Google Calendar.
To export a Google Calendar, open its Settings, and under Event permissions, make the URL public before you share the calendar.
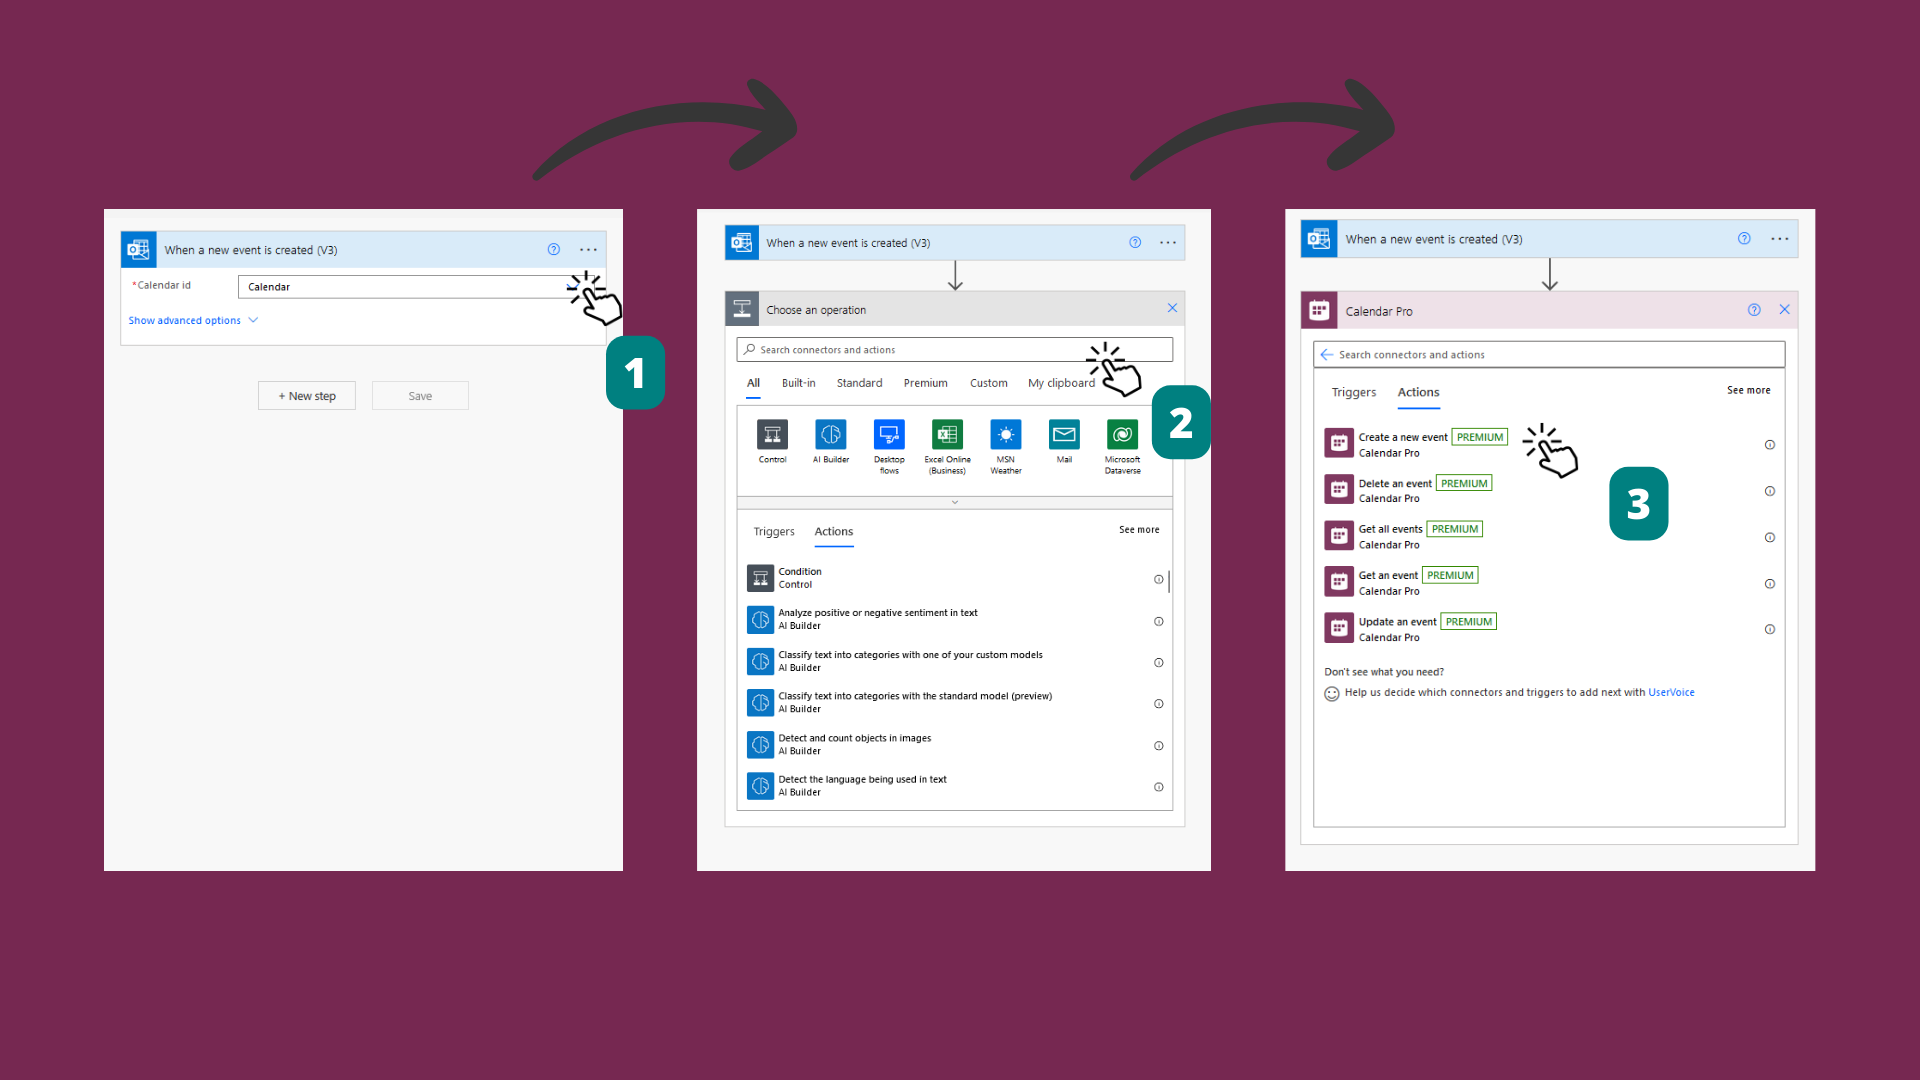
# Sync Outlook to Calendar Pro with Power Automate
Use a Power Automate flow to push events from an Outlook calendar into Calendar Pro whenever they change.
- 1
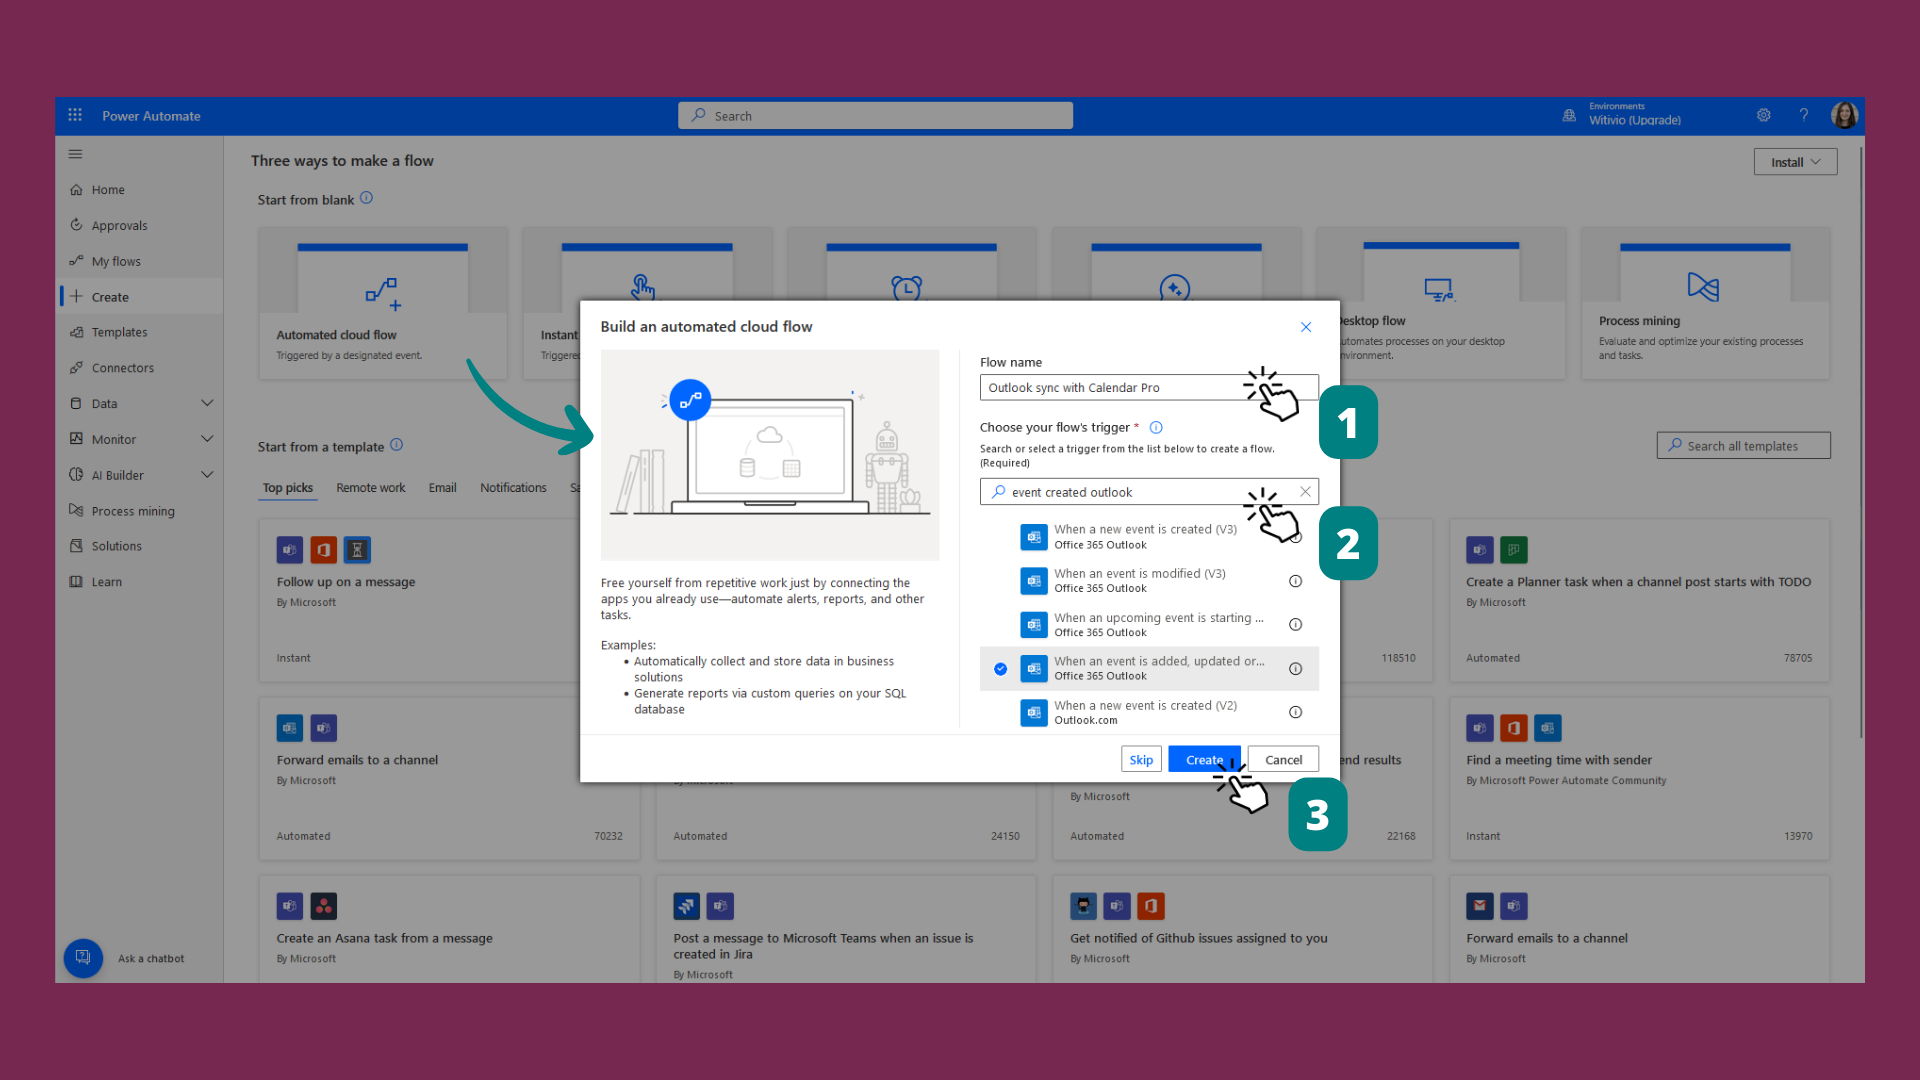
Open Microsoft Power Automate and start a new Automated Cloud Flow.
- 2
Name the flow (for example, Outlook to Calendar Pro Sync), choose When an event is added, updated, or removed from a calendar as the trigger, then click Create.
- 3
Select the Outlook calendar you want to sync with Calendar Pro.
- 4
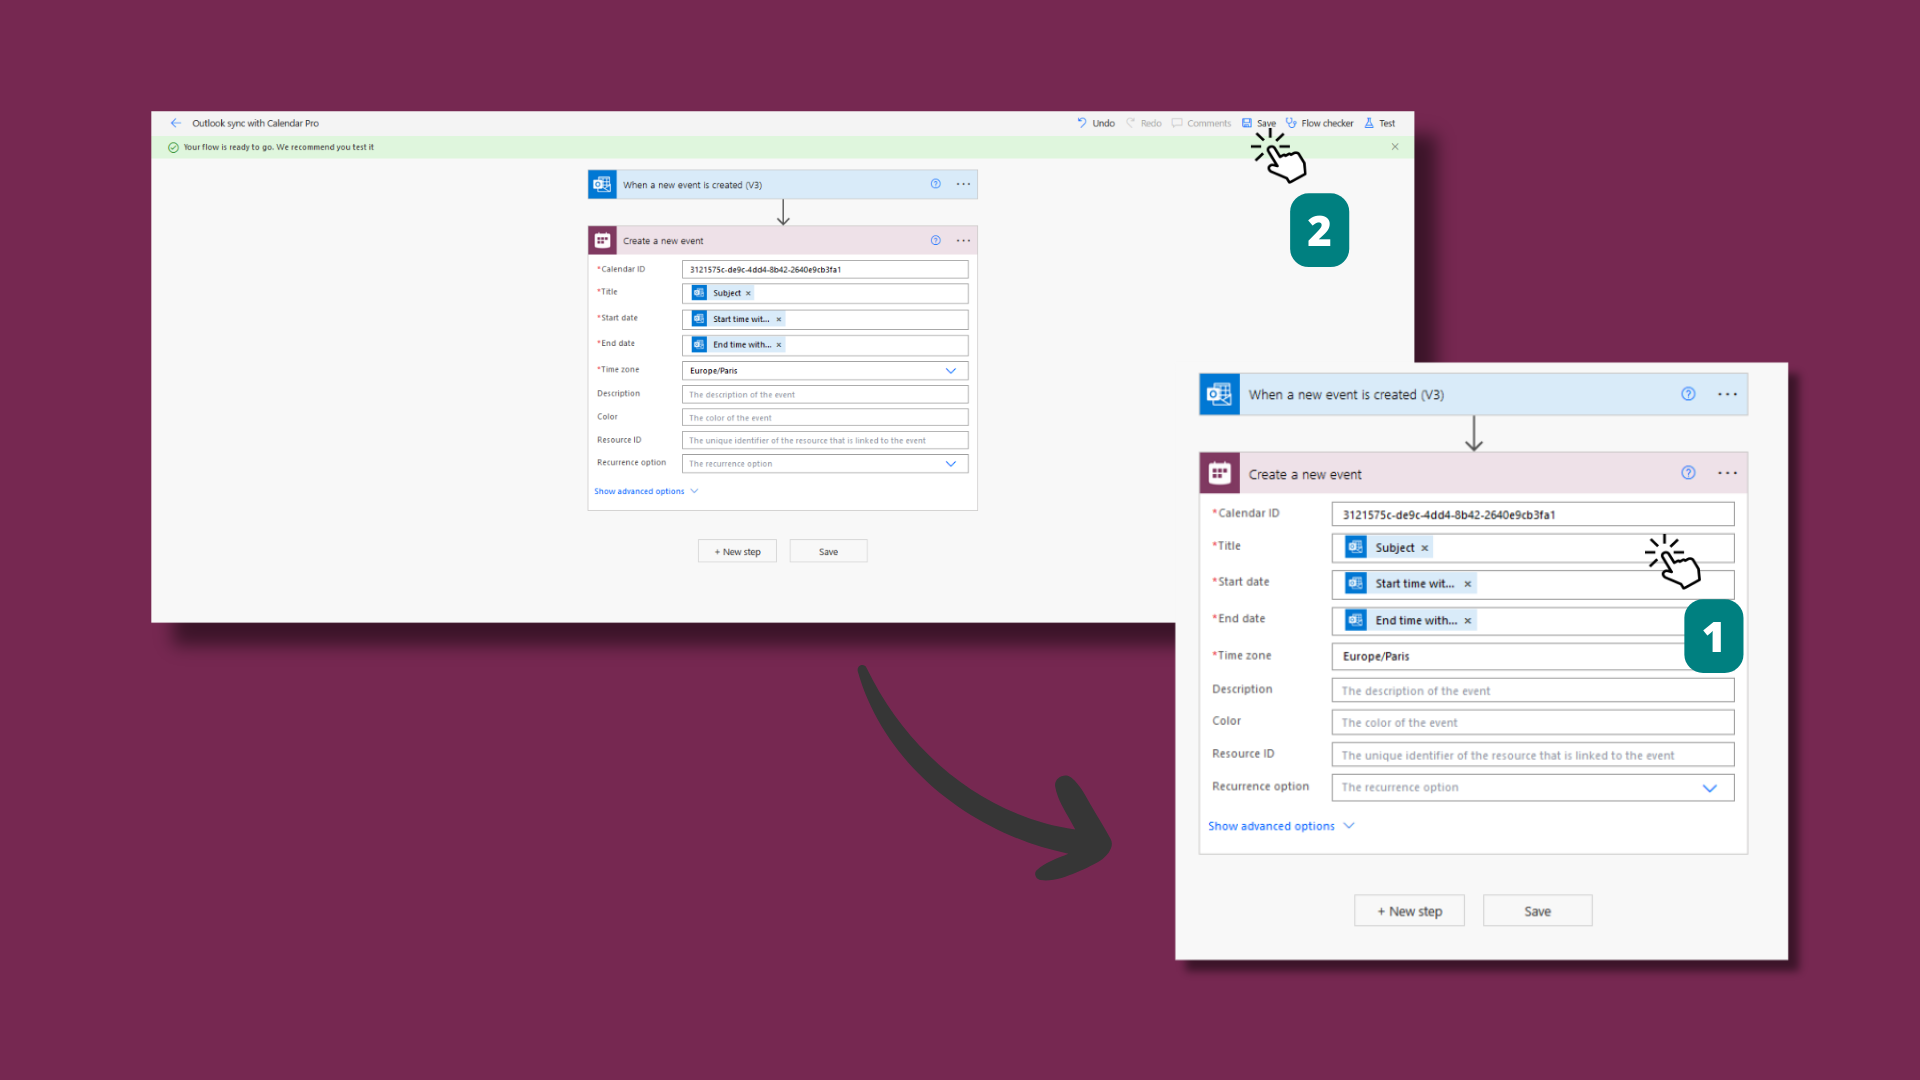
Click + New Step, search for Calendar Pro, enter the required details including your Calendar Pro ID, then click Save.
The first time you use the Calendar Pro Power Automate connector, enter the API key from your developer.teams-pro.com account profile.
# Manage your synchronized calendars
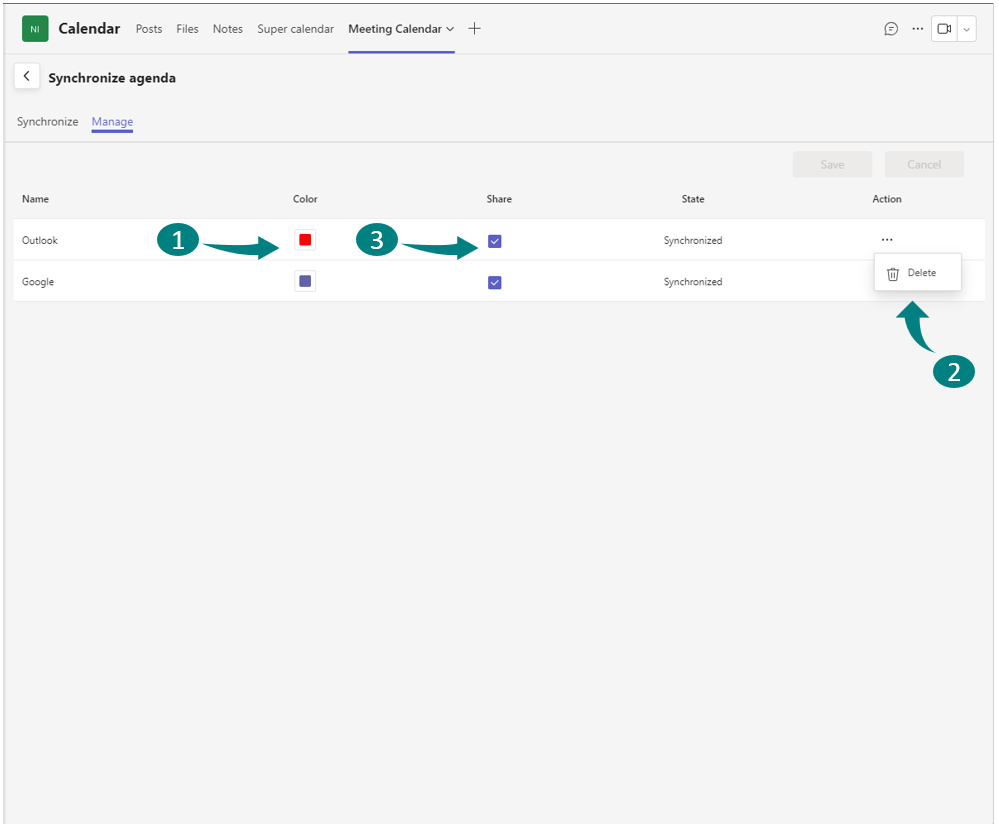
Set colors, control sharing, and remove calendars from the Manage tab of the sync panel.
- 1
In the sync panel, go to the Manage tab.
- 2
Set a distinct color for each calendar and its events.
- 3
Delete any calendar you no longer need.
- 4
Choose whether to share each calendar with other channel members.
Sharing works only if the calendar owner grants you the right permissions.
- 5
Click Save to apply your changes.
# Show synchronized calendars
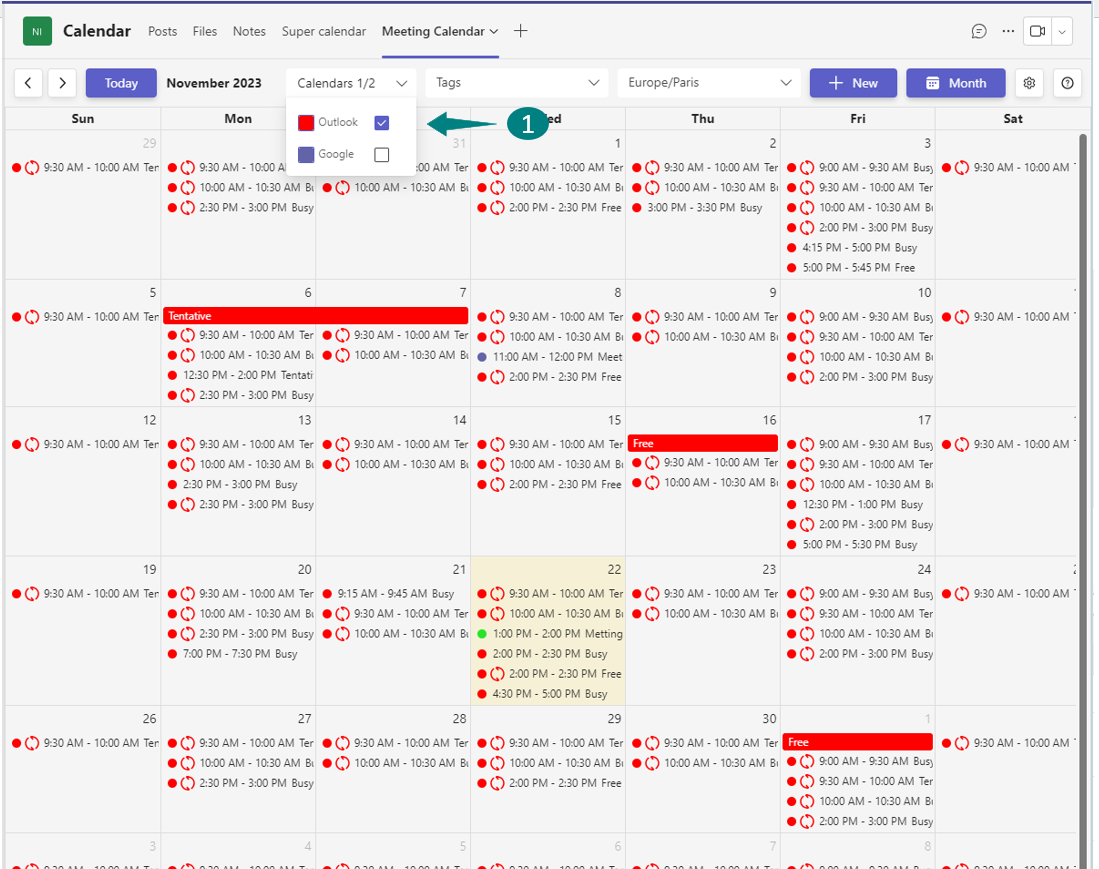
To choose which synchronized calendars appear, use the drop-down menu on your calendar and select the calendar events you want to display.
# Related pages
- Set up the calendar in the Calendar Pro Get Started guide.
- Review usage boundaries on the Calendar Pro limits page.
- Control who can edit synchronized calendars in managing permissions.