
# Files in an event
Attach documents to a Calendar Pro event so your team has the right context in one place. Every attachment stays with the event, and anyone who can see the event can open its files. This page shows you how to add files to an event and how to open them later.
File attachments are part of Advanced events, available on Premium and Platinum.
# Add files to an event
- 1
Open the event in your Calendar Pro tab.
- Click the event you want to attach files to.
- 2
Click the Add button to start attaching files.
- 3
Select the files you want to associate with the event.
- 4
Click Save.
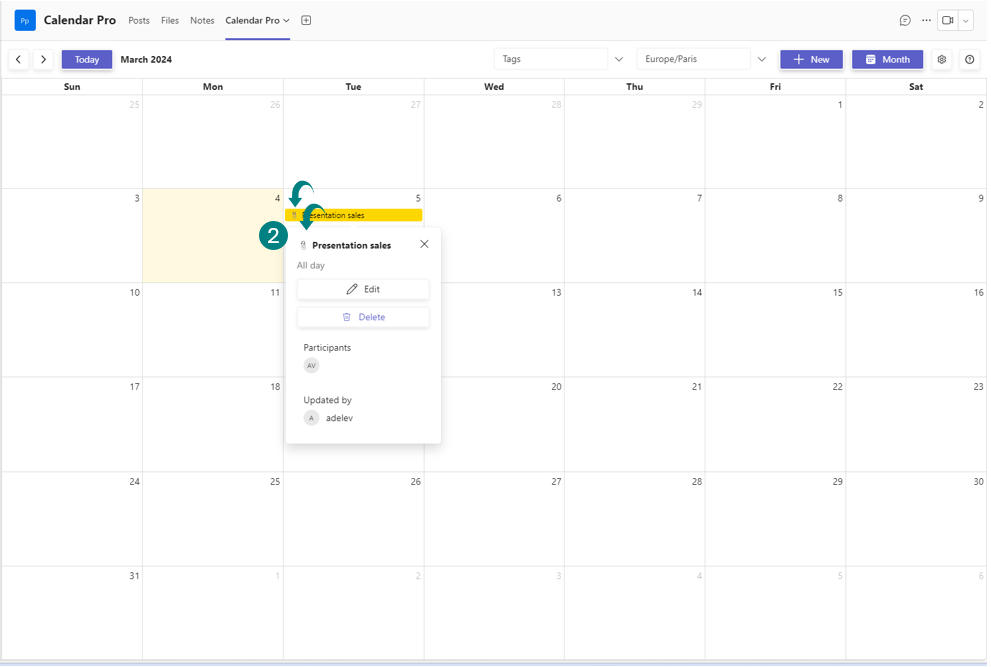
After the files are attached, a file icon appears next to the event in the calendar view.
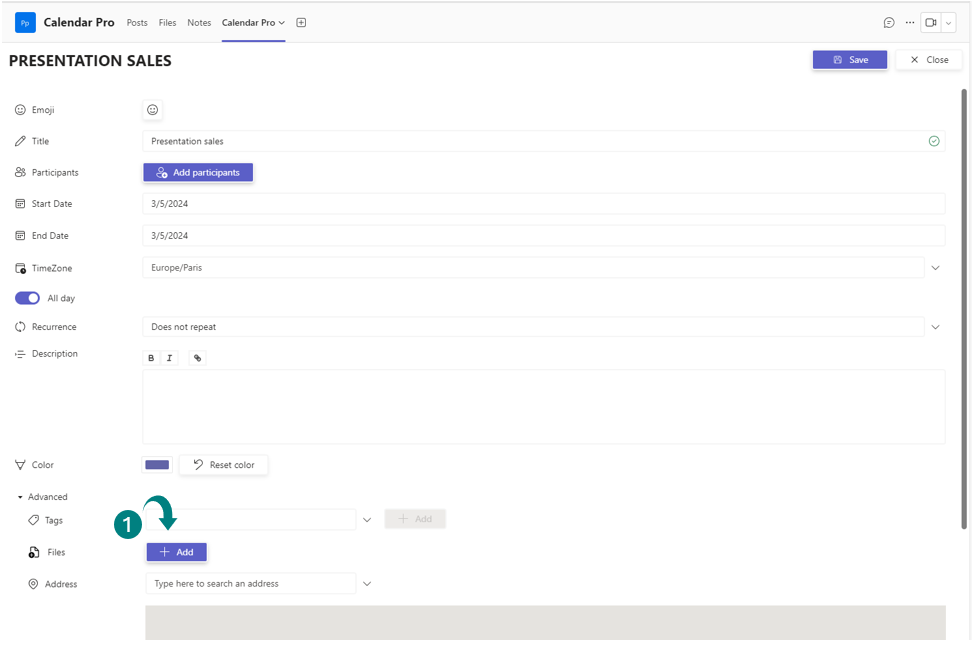
Once the files are attached, an icon appears alongside the event in the calendar.
# View the files on an event
- 1
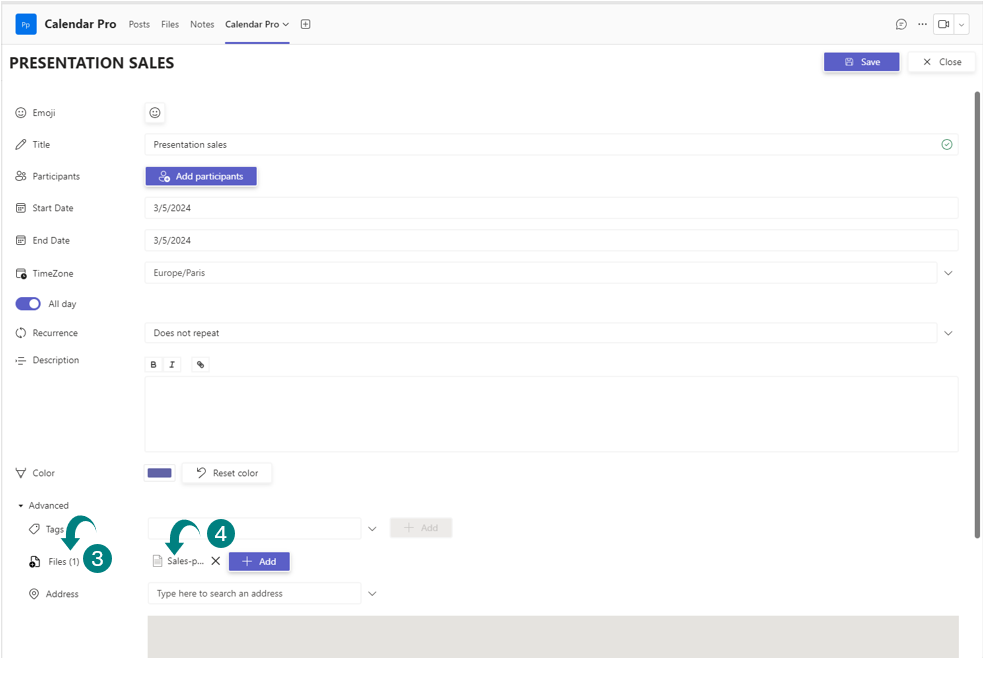
Click the Edit button on the event to open its details.
- 2
Review the number of attached files, then click a file to open its content.
Files attached to events are securely stored in your own Microsoft 365 (the Teams SharePoint or OneDrive behind the calendar), not on Witivio servers.
# Related pages
- Learn the full event form in creating and managing events.
- Set colors, tags, and locations in personalizing events.
- New to the app? Start with the Calendar Pro Get Started guide.