
# Managing events in Calendar Pro
Events are the heart of your shared Calendar Pro calendar in Microsoft Teams. This page shows you how to create an event, edit its details, and delete it. Every change you save is reflected right away for everyone in the channel.
# Create an event
- 1
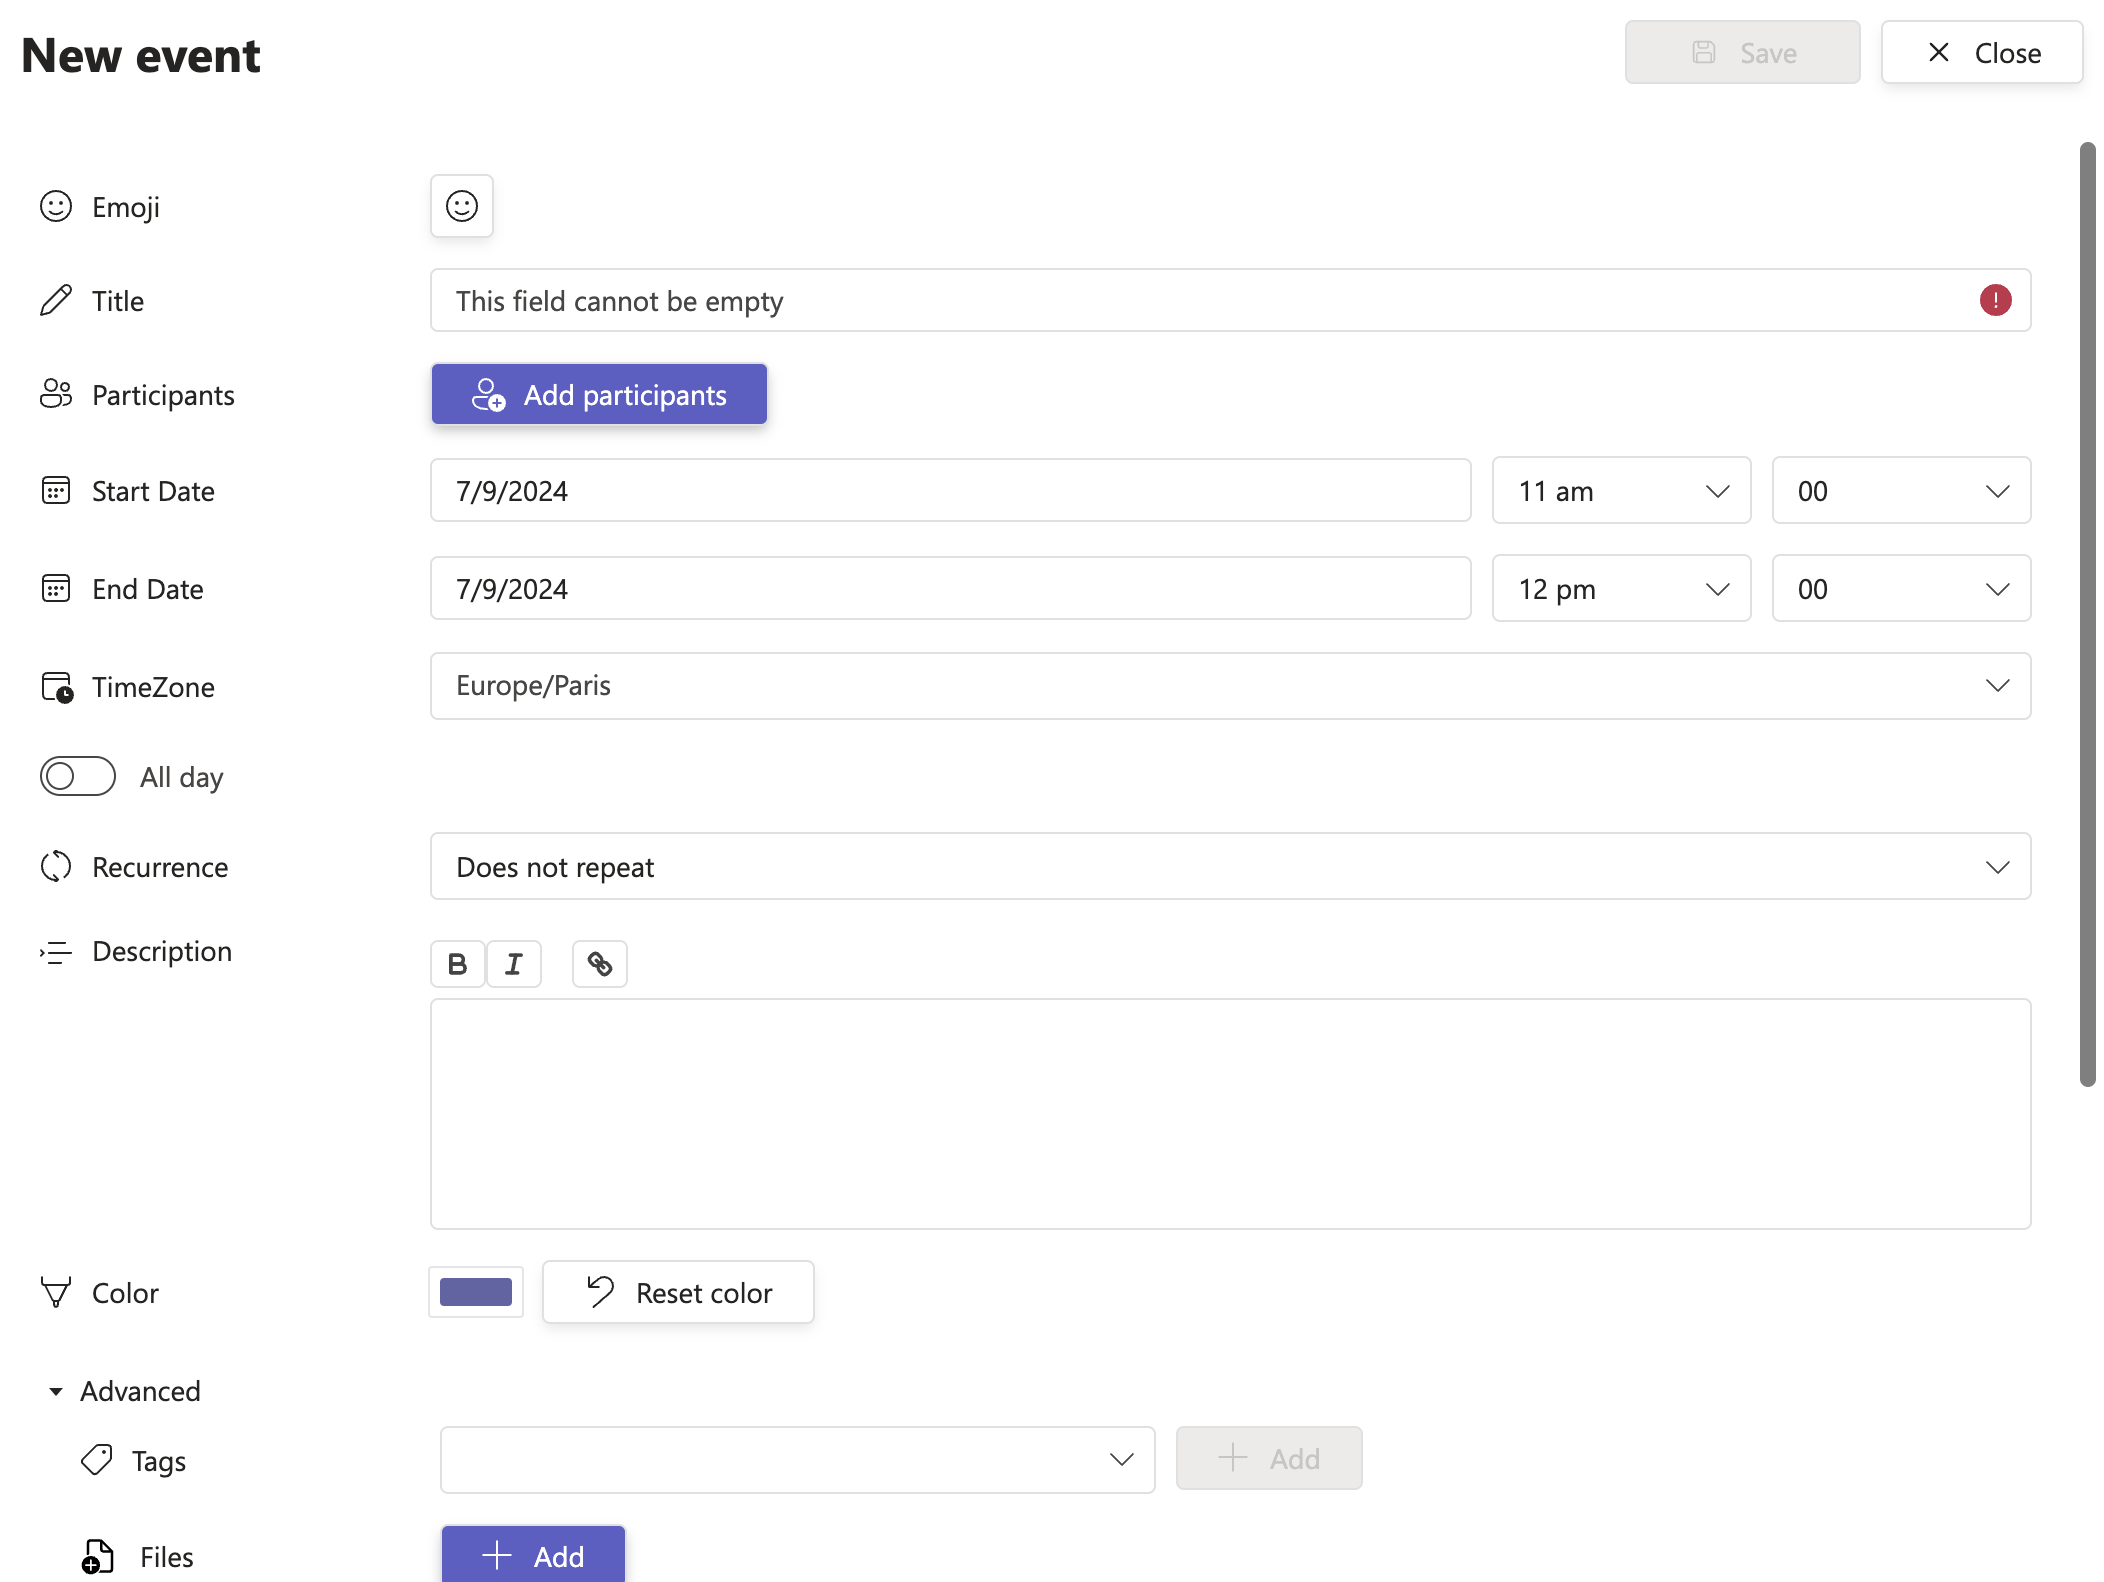
Open the Calendar Pro tab, then click the New button in the calendar view to open the event form.
You can also click a day in the calendar to start a new event on that date.
- 2
Enter a Title for the event. This field is required.
- 3
Add attendees under Participants.
- 4
Set the start and end dates and times.
- Turn on All day if the event lasts the entire day.
- Choose the correct Timezone for the event.
- 5
Add a Description, using the bold, italic, and link formatting tools if needed.
- 6
Click Save. The event appears for everyone in the channel.

# Edit an event
- 1
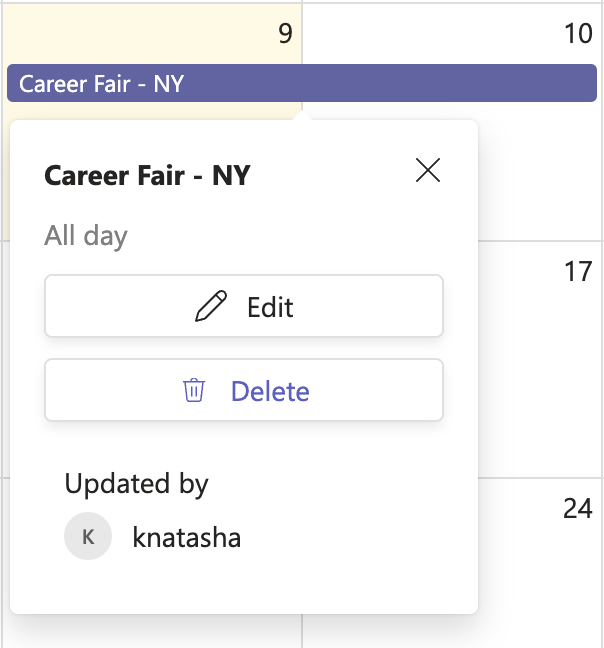
Click the event in the calendar view.
- 2
Select Edit.
- 3
Make your changes, then click Save. Updates appear immediately for all participants.
# Delete an event
- 1
Click the event in the calendar view.
- 2
Select Delete.
# Common questions
# Will participants be notified when I add, edit, or delete an event?
Yes. When Notifications are enabled in Settings > Notifications, Calendar Pro sends a Teams notification for added, updated, and deleted events. See notifications for details.
# Who can edit events?
Editing depends on the permissions set for the calendar: everybody can edit, only owners can edit, or custom roles. Anyone with edit rights can update event details, and the changes appear to all participants. See managing permissions.
# Do changes appear instantly for the team?
Yes. Any update you save is reflected immediately in the shared calendar for all participants.