
# Managing Permissions in Booking Room Pro
Permissions control who can add, edit, and delete bookings in a shared Booking Room Pro. Choose a single mode for the whole channel, or switch to custom permissions to grant rights member by member. This page shows how to set permissions and how per-member rights work.
# Permission modes
Booking Room Pro offers three permission modes. One mode is always selected, and by default every member of the channel can manage bookings.
# Set the booking permissions
- 1
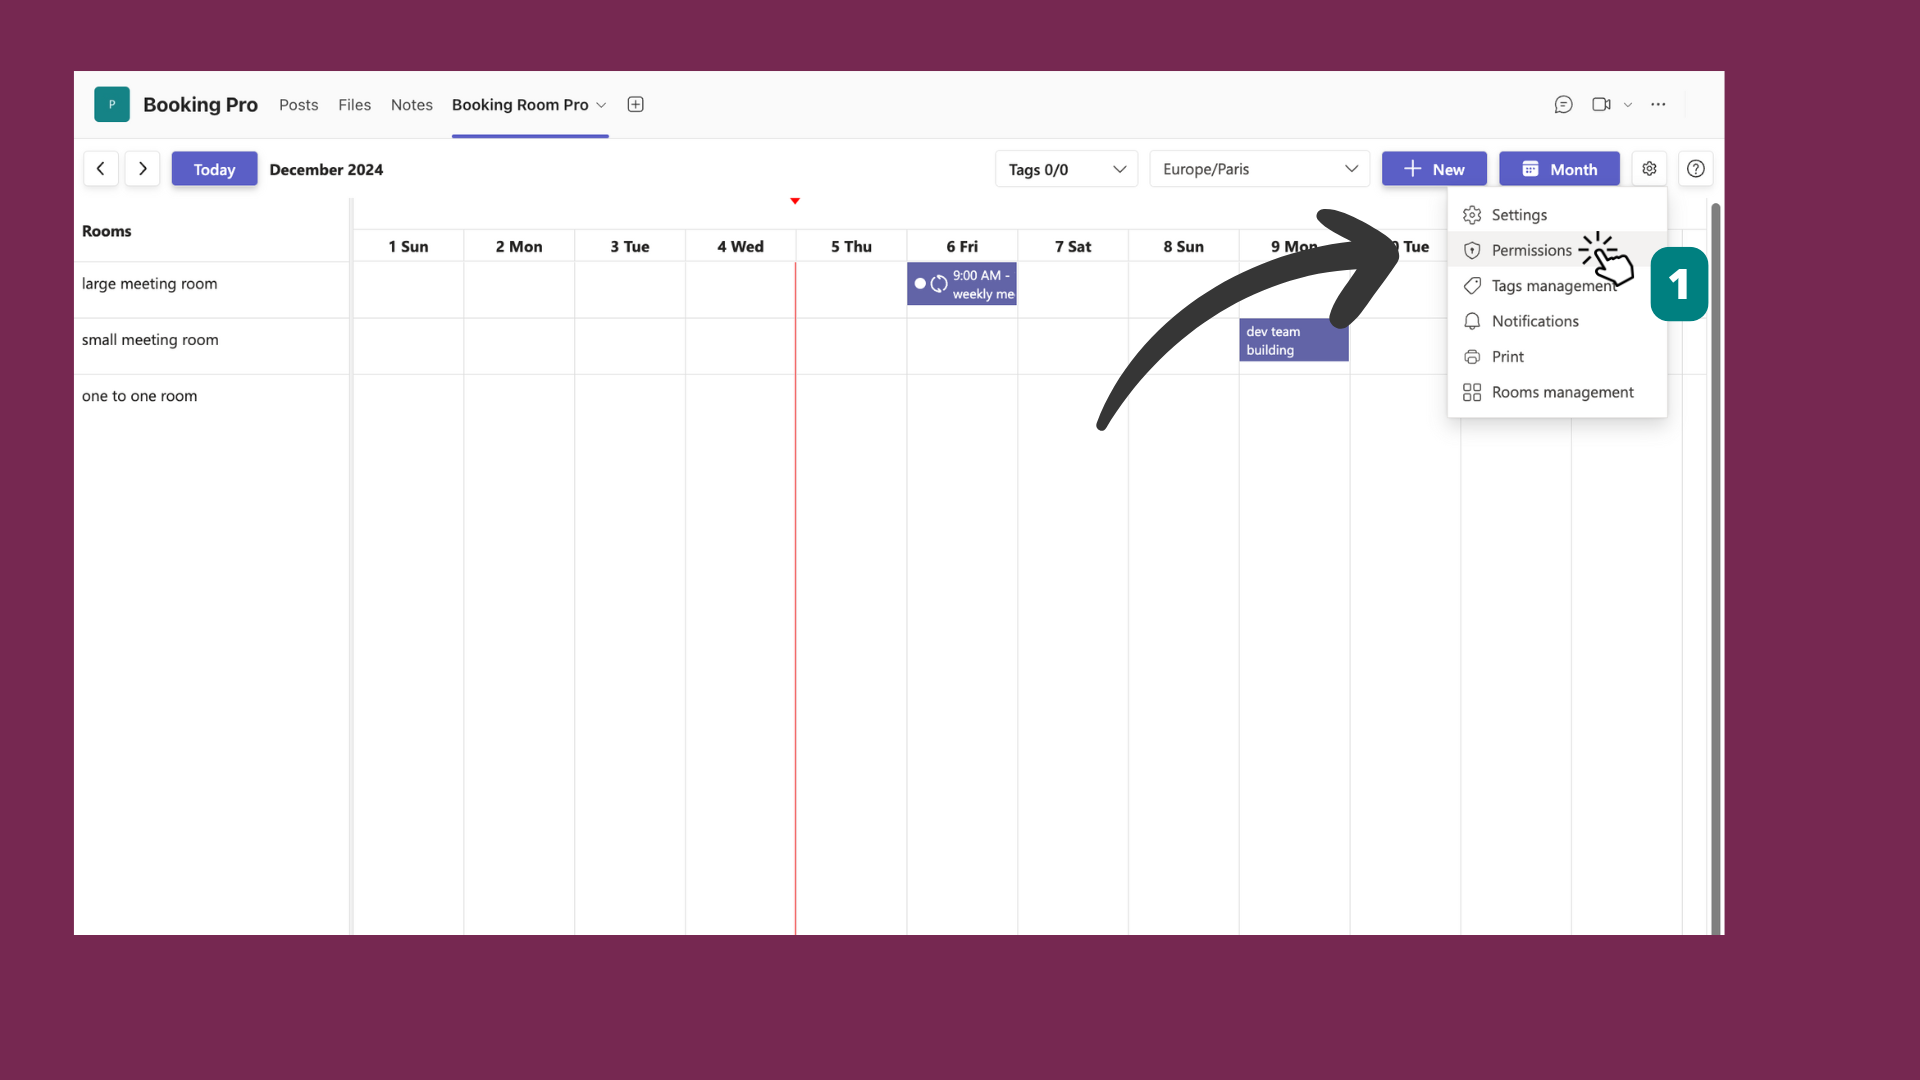
Open your Booking Room Pro and click the Settings icon at the top right of the calendar.
- 2
Select Permissions from the menu.
- 3
Choose a permission mode: Everybody in this channel can add/edit bookings, Only owners can add/edit bookings, or Customize permissions.
- 4
Click Save to apply your choice.
# Customize permissions per member
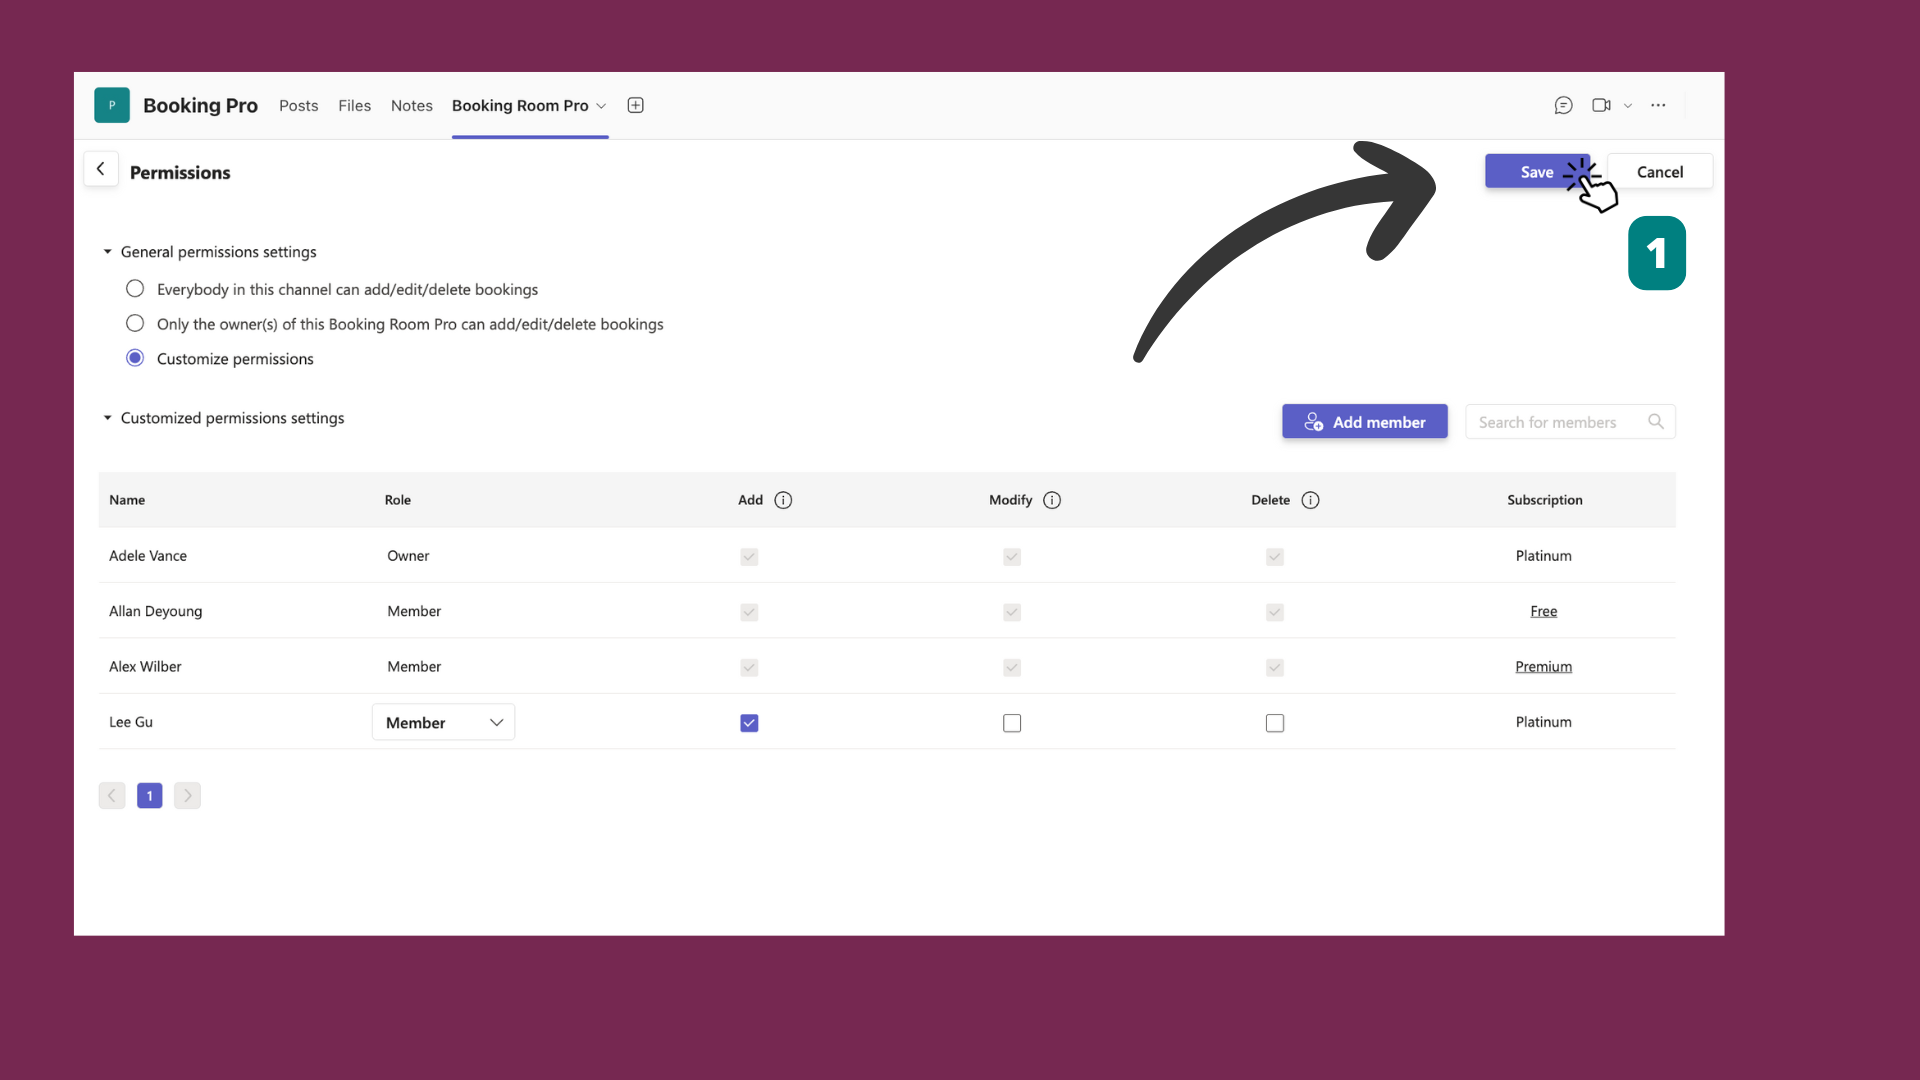
Custom permissions let you tune rights for each user. When you select this mode, a second section opens with a per-member table where you add members and set exactly what each one can do.
- 1
In the Permissions dialog, select Customize permissions to open the per-member settings.
- 2
Click Add member and use the search bar to find and add each member you want to configure.
- 3
For each member, select the rights to grant: Add, Modify, and Delete.
- 4
Click Save to apply the changes.
# Good practices
- Review regularly: Check permissions often so they match current team roles and responsibilities.
- Limit access: Restrict rights to the people who need them to keep control of the booking room.
- Clear roles: Define roles and share them with your team to avoid confusion.
# Related pages
- Learn who can own a Booking Room Pro in who is the creator and owner of the tab.
- Compare plans and unlock owners-only permissions on the Premium vs Free comparison.
- See how members create bookings in how to add an event.