
# How KeePass Pro works
KeePass Pro is built around three ideas: vaults, tabs, and permissions. Together they give your team a flexible, secure way to store and share credentials right inside Microsoft Teams.
# Vaults
Vaults are secure digital containers for your items. Each vault is protected by a master password and encrypted with AES-256, the standard used by the KeePass .kdbx format. A vault can be personal (only you can open it) or shared (available to everyone in a channel).
# Create and organize vaults
- 1
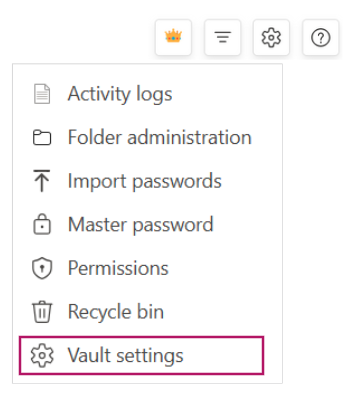
Click the Settings button (gear icon).
- 2
Select Vault settings.
- 3
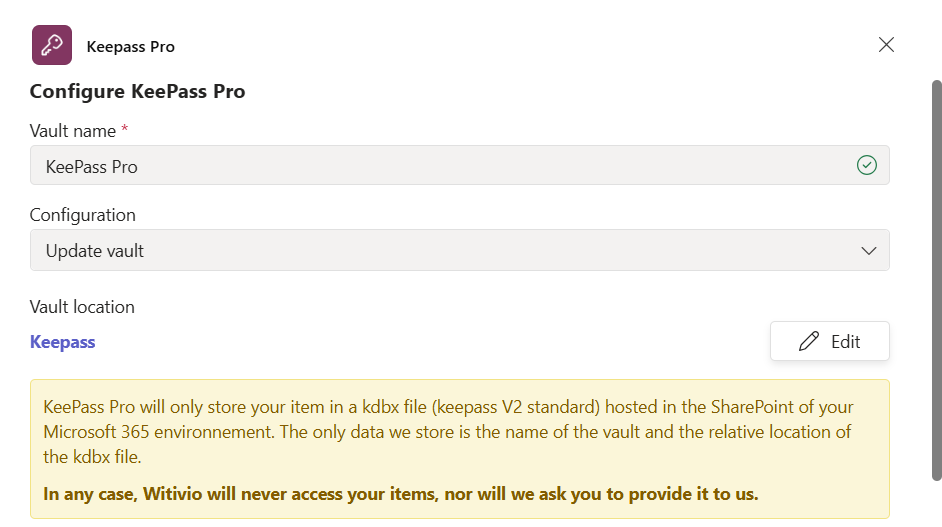
Configure your vaults. Create as many as you need to organize items by project, department, or client.
# Personal vs shared vaults
- Personal vaults hold your private credentials. No one else can open them, and you can pin them to your Teams navigation bar. They are ideal for admin logins or confidential client information.
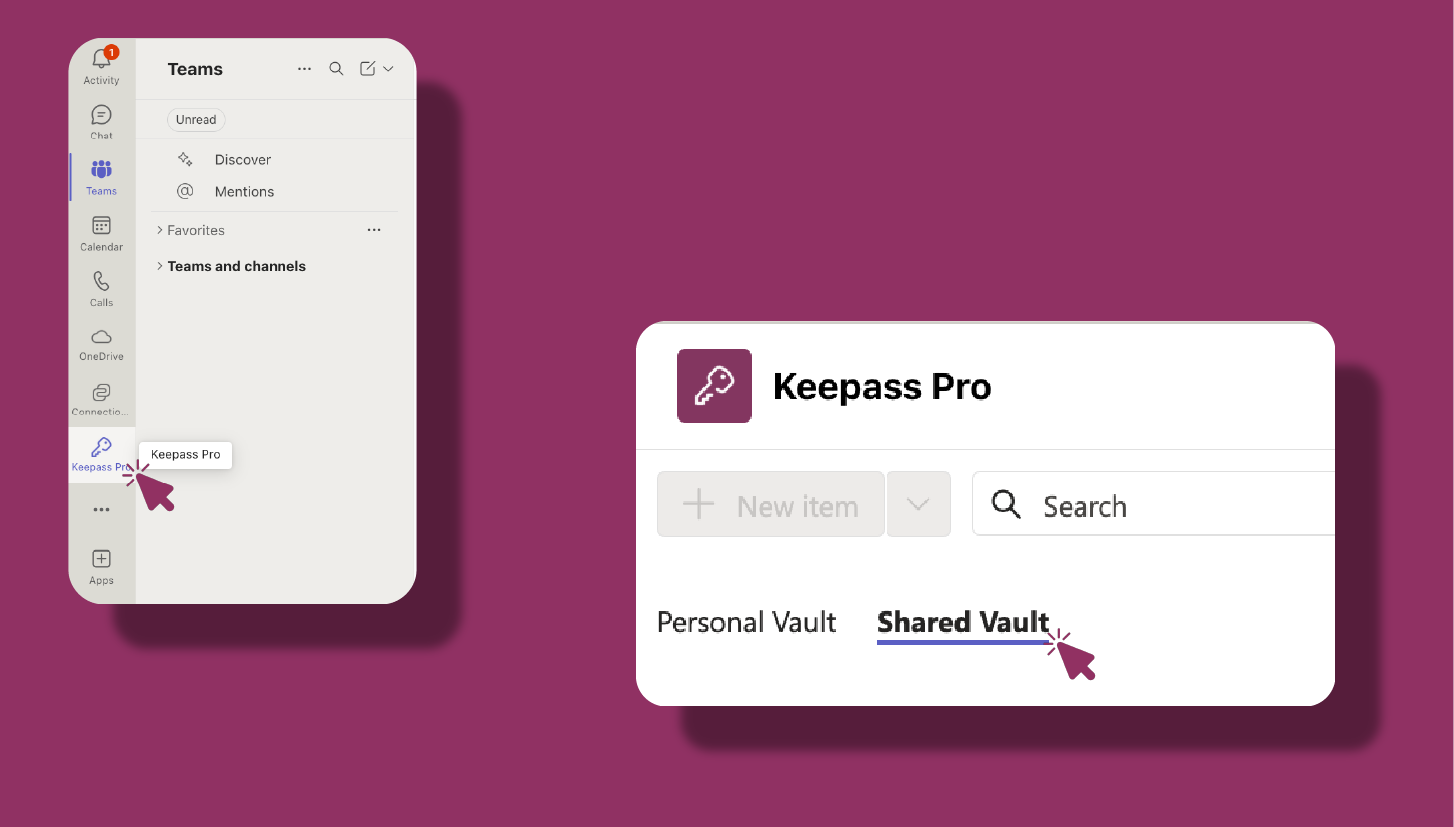
- Shared vaults are added as tabs in your Teams channels so you can share credentials with colleagues. They are perfect for server logins, Wi-Fi passwords, or API keys that a whole team needs.
Key vault features:
- Unlimited items on Premium and Platinum (up to 3 items per vault on Free).
- AES-256 encryption for every item.
- Master password protection against unauthorized access.
- Folders for structured organization (Platinum).
# Tabs
Tabs organize your vaults within Microsoft Teams. Each tab maps to a specific vault, so you can switch quickly between different sets of credentials. Adding KeePass Pro as a tab in a channel makes that vault available to every member of the channel.
Use tabs effectively:
- Project or department tabs keep credentials from mixing across teams.
- Client tabs store and share the passwords for one client in a single place.
- Shared vs personal means shared tabs are open to a channel, while a personal vault can be pinned to your navigation bar for private access.
# Permissions
Permissions control who can view, edit, and manage items in each vault, so only authorized people reach sensitive information.
# Manage permissions
- 1
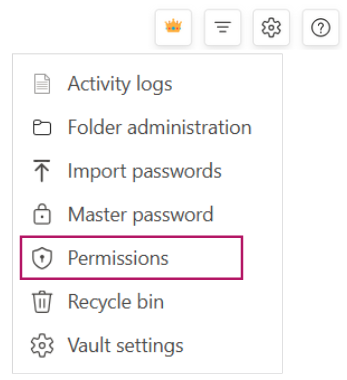
Click the Settings button (gear icon).
- 2
Select Permissions.
- 3
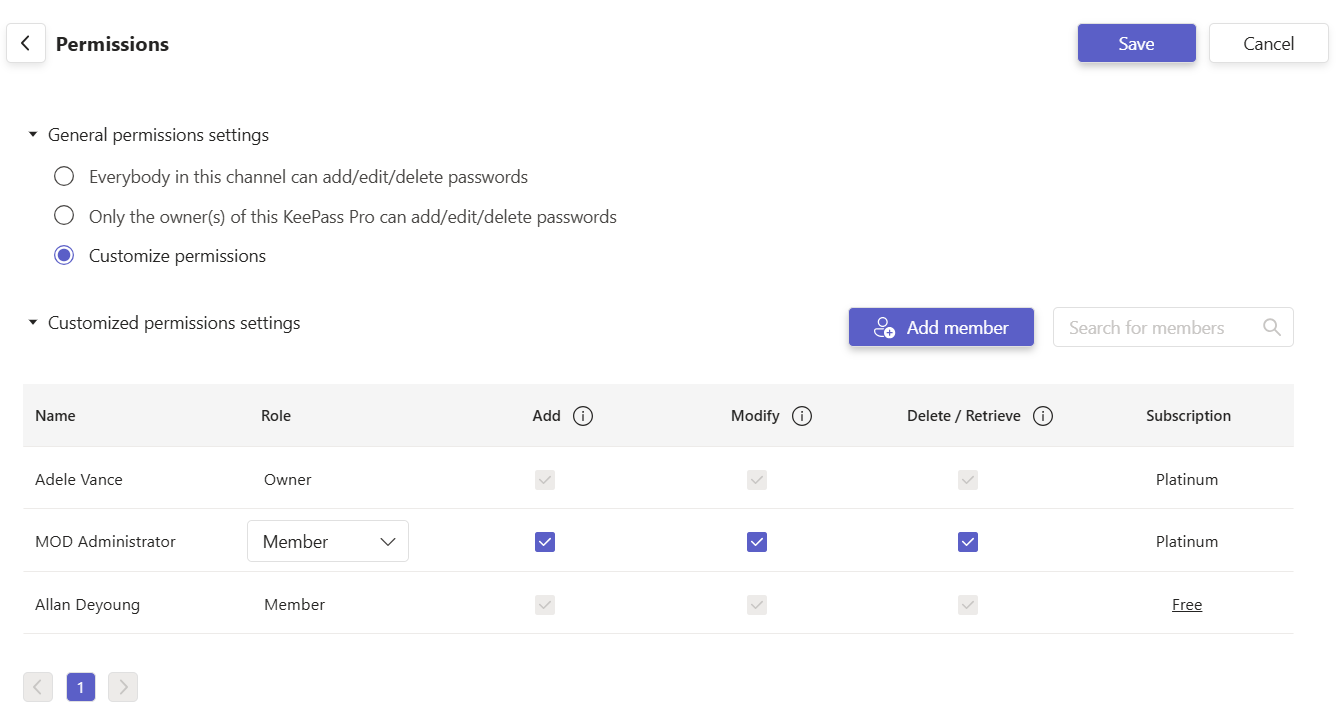
General permissions set one access mode for everyone in the shared channel, which is useful for large teams.
- 4
Customized permissions set individual access per user, such as view only, edit, delete, or full control.
# Folder and password-level permissions
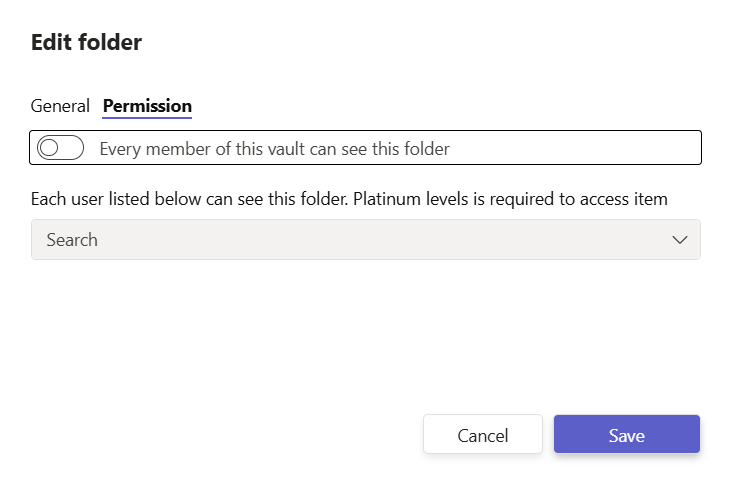
For more granular control, manage access at the folder level. For example, you can restrict HR credentials to only the HR team.
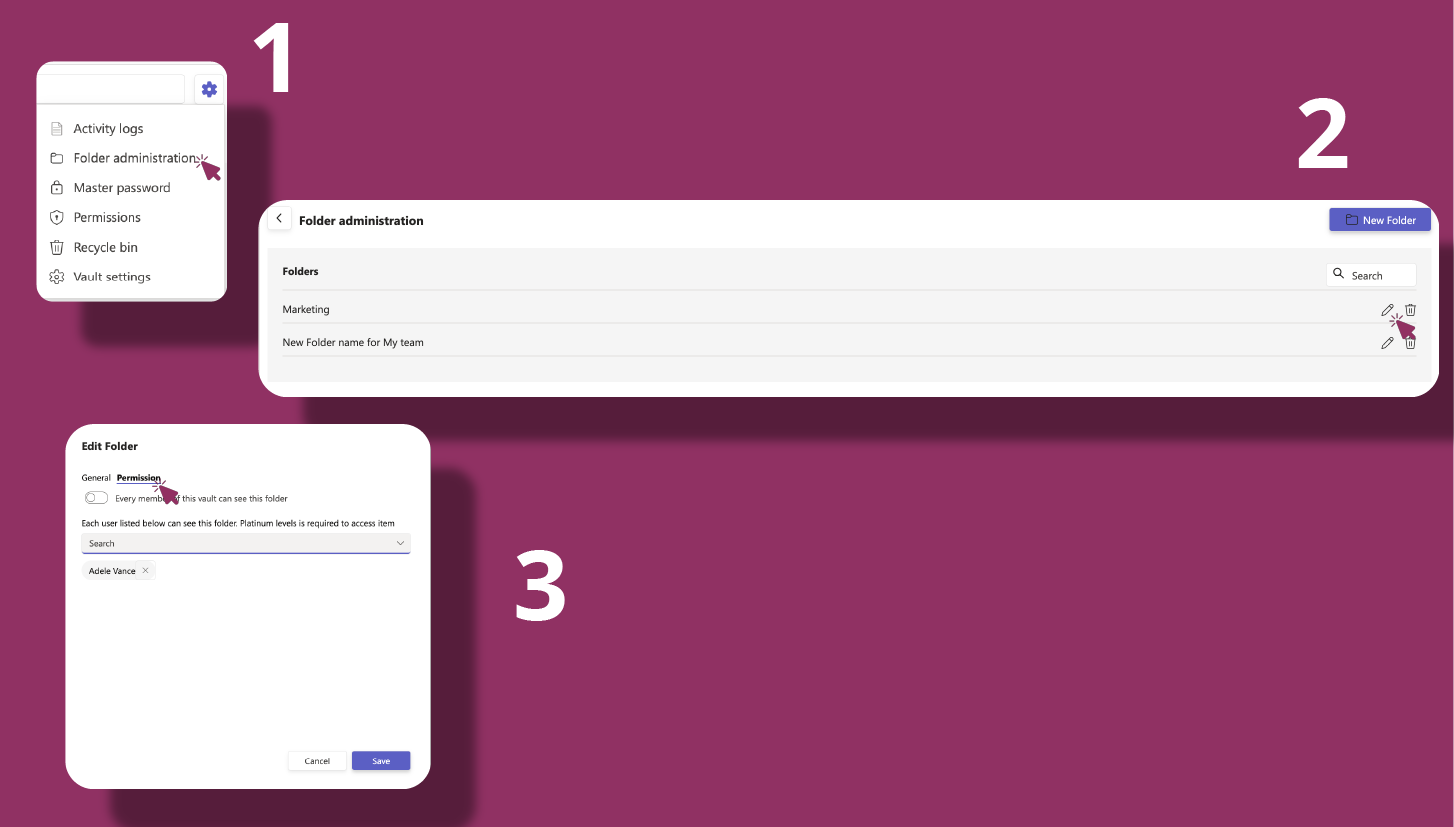
Key permission settings:
- Add items lets users create new entries.
- Modify items lets users update existing entries.
- Delete items lets users permanently remove entries.
- Owner rights transfer ownership of a vault to another team member.
# Folders
Folders group related items inside a vault so larger teams can keep credentials tidy.
# Manage folders
- 1
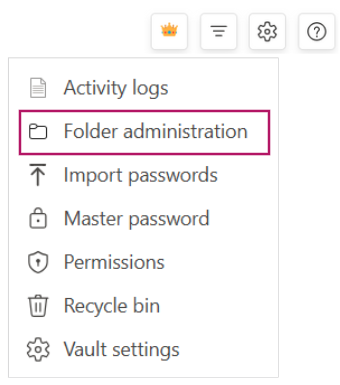
Click the Settings button (gear icon).
- 2
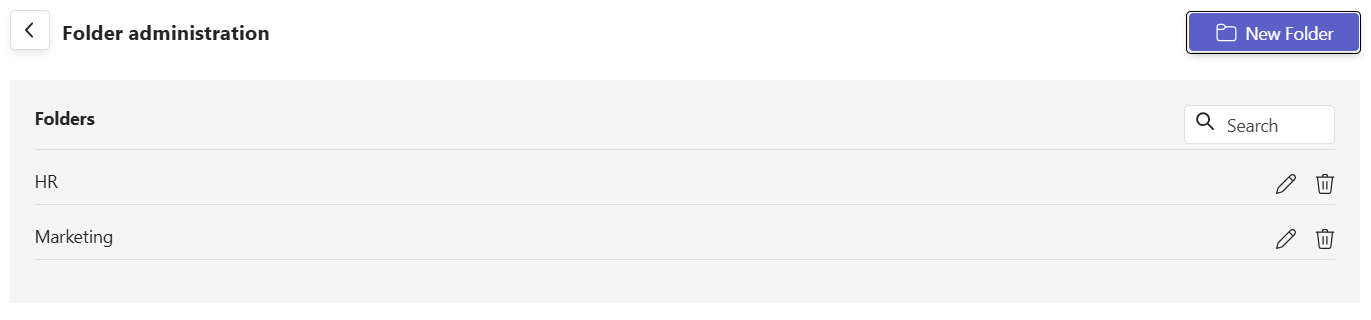
Select Folder administration.
- 3
To create a folder, click New folder, enter a name, set any permissions, then confirm.
- 4
To edit a folder, select it, choose Edit, update the name or permissions, then save.
# Related pages
- Set up your first vault in the KeePass Pro Get Started Guide.
- Go deeper on vault management and sharing and collaboration.
- See which capabilities each tier unlocks on the Access to KeePass Pro plans page.
- Still have questions? Browse the KeePass Pro Q&A.