
# KeePass Pro Administration
This page covers the everyday administration tasks for KeePass Pro in Microsoft Teams: adding the app to a channel, finding a tab ID for support, choosing where the vault is stored, renaming a vault, viewing the master password, and recovering or purging deleted items. Most of these tasks are available on every plan; the exceptions are called out below.
# Add KeePass Pro to a channel
Add KeePass Pro as a tab so the vault lives right next to the channel conversations it supports. You can add it from AppSource or from inside the channel.
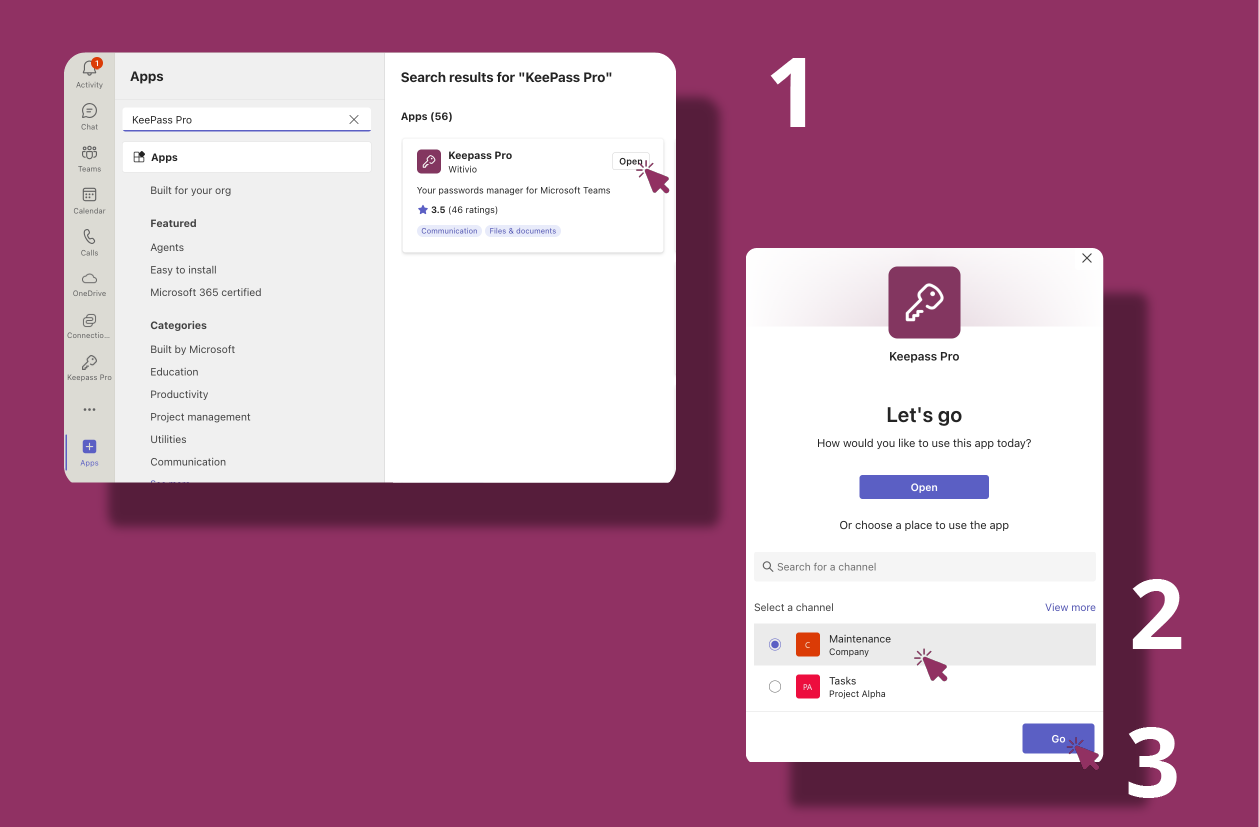
- 1
Open Microsoft Teams and go to Apps (AppSource) in the left sidebar.
- 2
Search for KeePass Pro, then click Add to a team.
- 3
In Type a team or channel name, search for and select the target team or channel.
- 4
Click Set up a tab, configure KeePass Pro, then click Save.
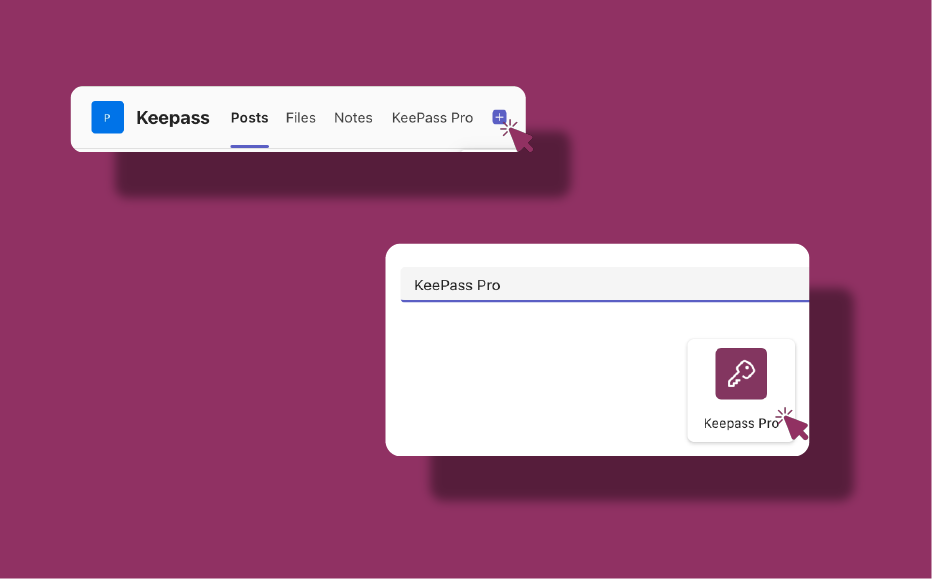
You can also add KeePass Pro from inside a channel: click the + button at the top of the channel, search for KeePass Pro, and add it as a tab.
# Get the KeePass Pro tab ID
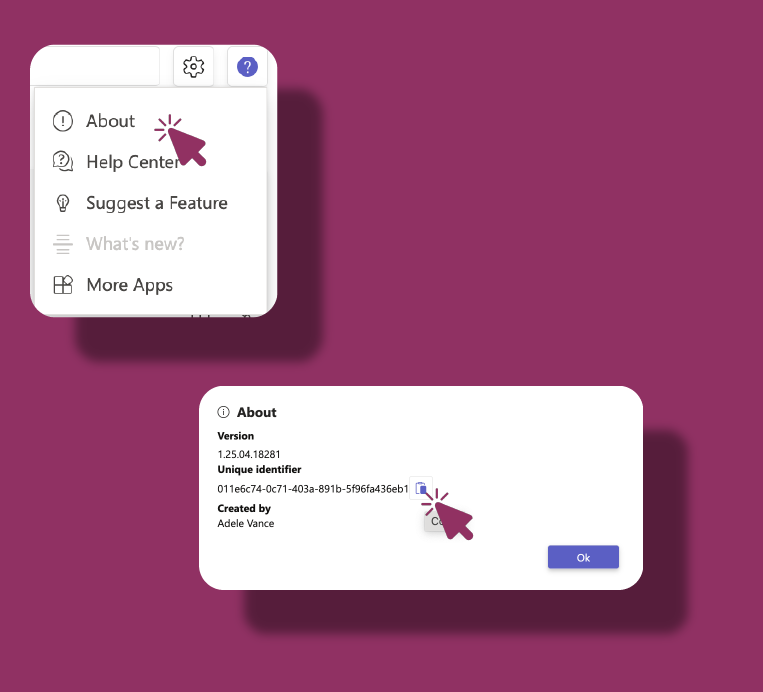
The tab ID (Unique identifier) helps the support team locate your exact vault when you open a ticket. You can also use it to link KeePass Pro with other Teams Pro apps.
- 1
Click the ? icon at the top left of the tab.
- 2
Select About from the drop-down menu.
- 3
Copy the Unique identifier that is displayed.
# Set the vault location
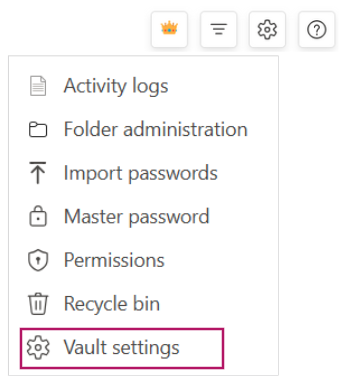
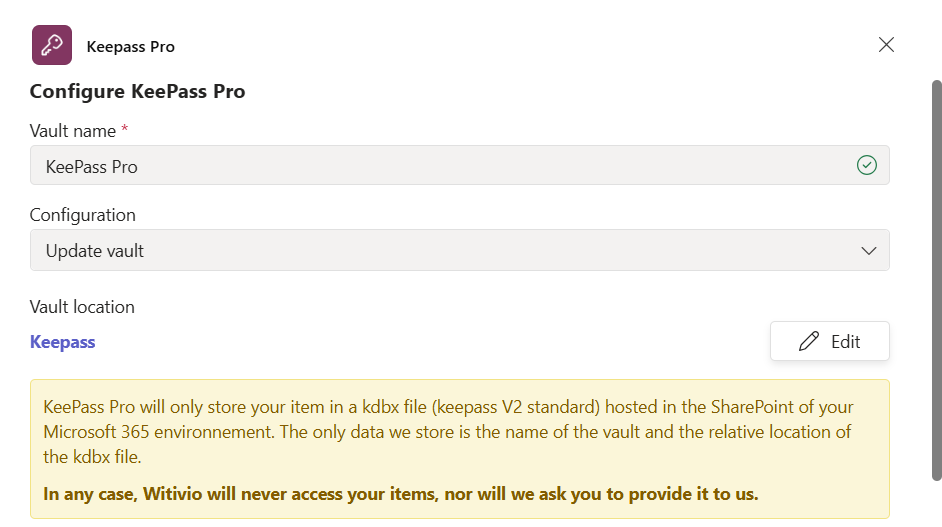
KeePass Pro stores your vault as a .kdbx file in the SharePoint site of your Microsoft 365 environment. You choose which folder holds that file when you finish setting up the tab.
- 1
Finish setting up the KeePass Pro tab to open the Settings window.
- 2
Under Vault location, choose the SharePoint folder where you want the vault to be stored.
- 3
Click Save.
# Rename a vault
The vault name is the label shown on the tab. You can change it at any time without affecting the stored items.
- 1
Open your KeePass Pro tab and click Settings.
- 2
Go to the Vault name section and enter the new name.
- 3
Click Save.
You can rename a vault anytime after it is set up.
# Access the master password
The master password protects the vault. It is created when the vault is set up and it is the only key to the encrypted .kdbx file.
- 1
Open your KeePass Pro tab and click Settings.
- 2
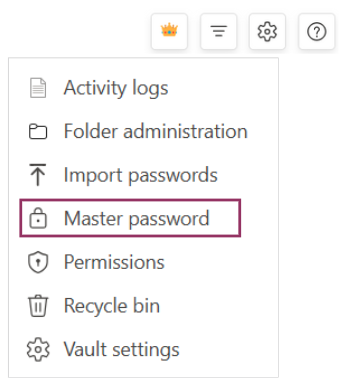
Select Master password to view or copy the master password.
# Recycle bin: recover or permanently delete items
Deleted items move to the recycle bin first, so you can restore them if you change your mind. Clearing the recycle bin frees up space against the free-plan item count.
- 1
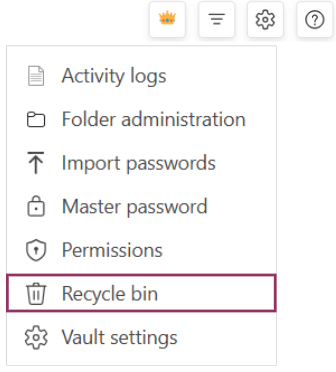
Open your KeePass Pro tab and go to the Recycle bin section.
- 2
Review the list of deleted items.
- 3
Select an item, then choose Retrieve to return it to its original folder, or Delete to remove it permanently.
- 4
Confirm your choice if prompted.
# Related pages
- Create, clone, and import vaults in Vault management.
- Share items and set folder access in Sharing and collaboration.
- Review plan gating and other constraints in Limitations.
- New to the app? Start with the KeePass Pro Get Started guide.