# Managing Permissions in Parking Pro
# Setting Permissions Settings
- Open Permissions Menu:
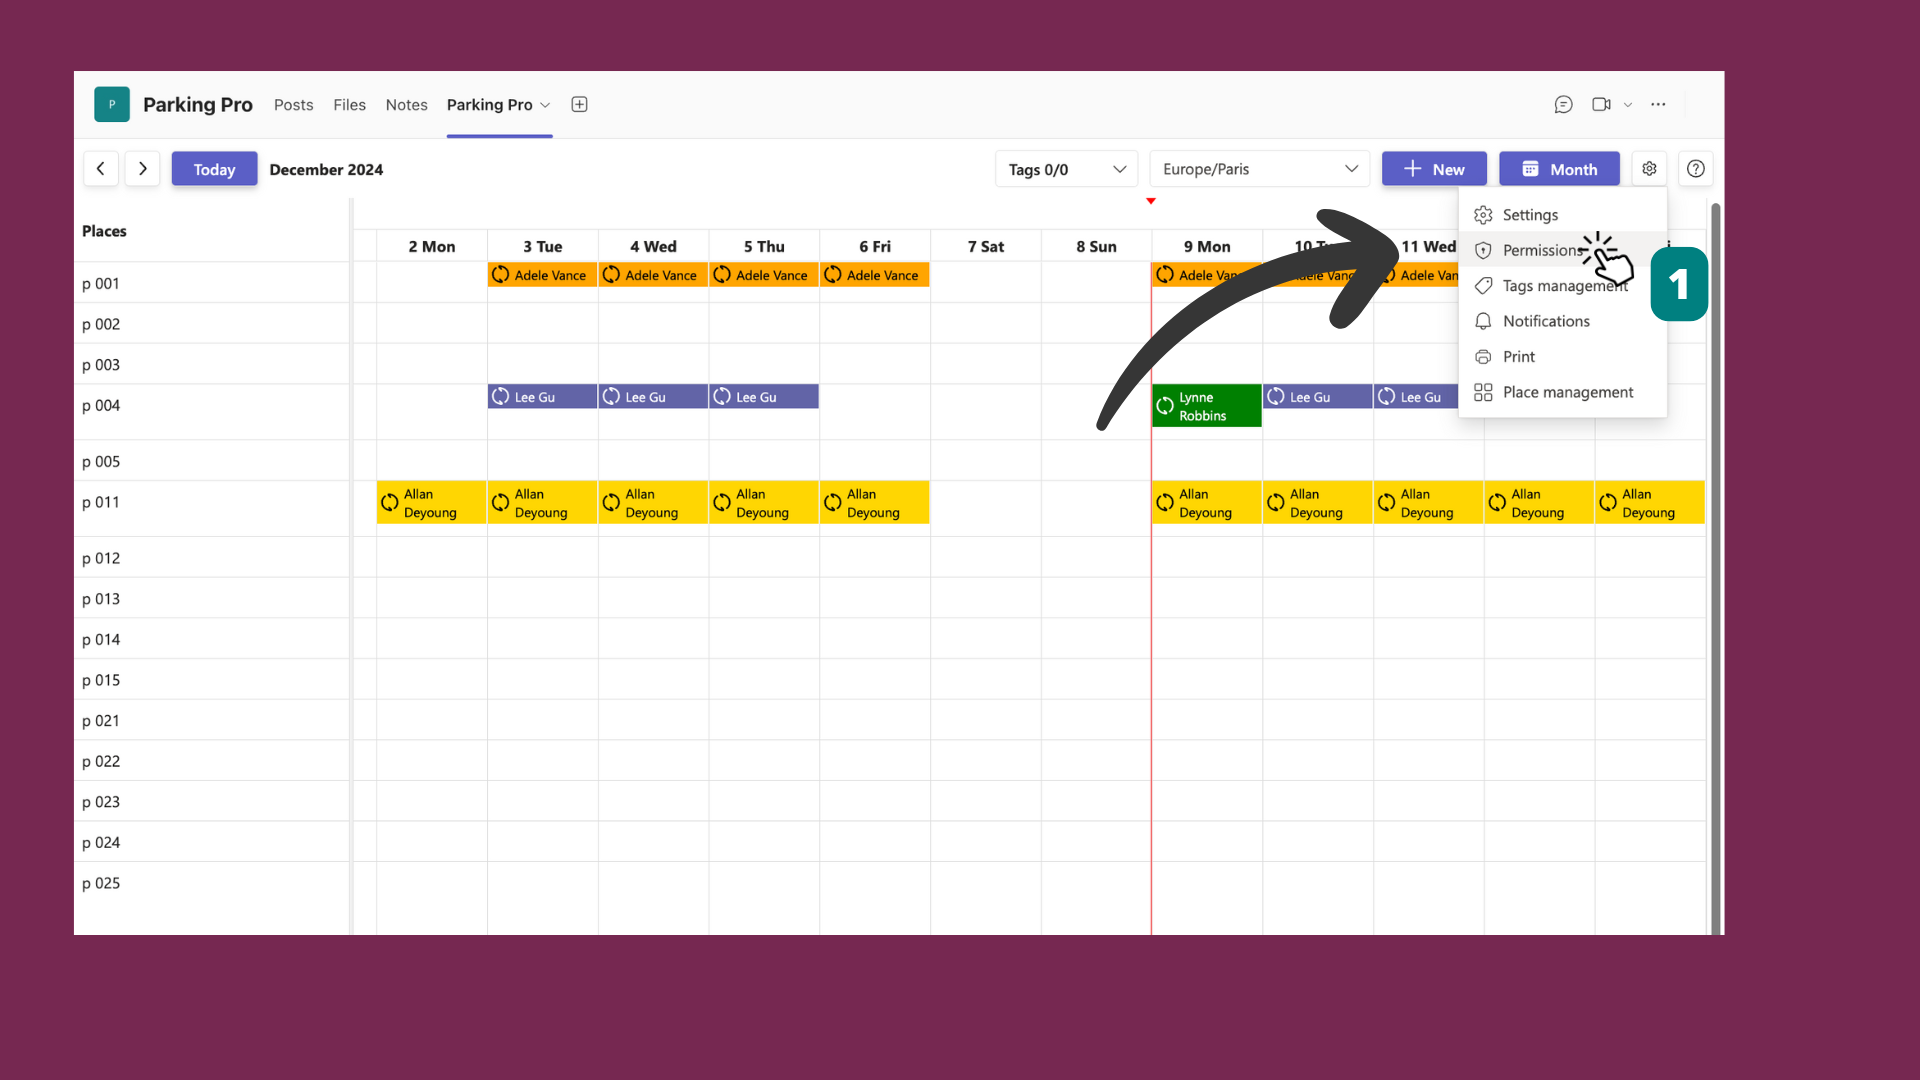
- Click on the settings icon located at the top-right corner of the calendar interface.
- From the dropdown menu, select "Permissions."

- General Permissions Settings:
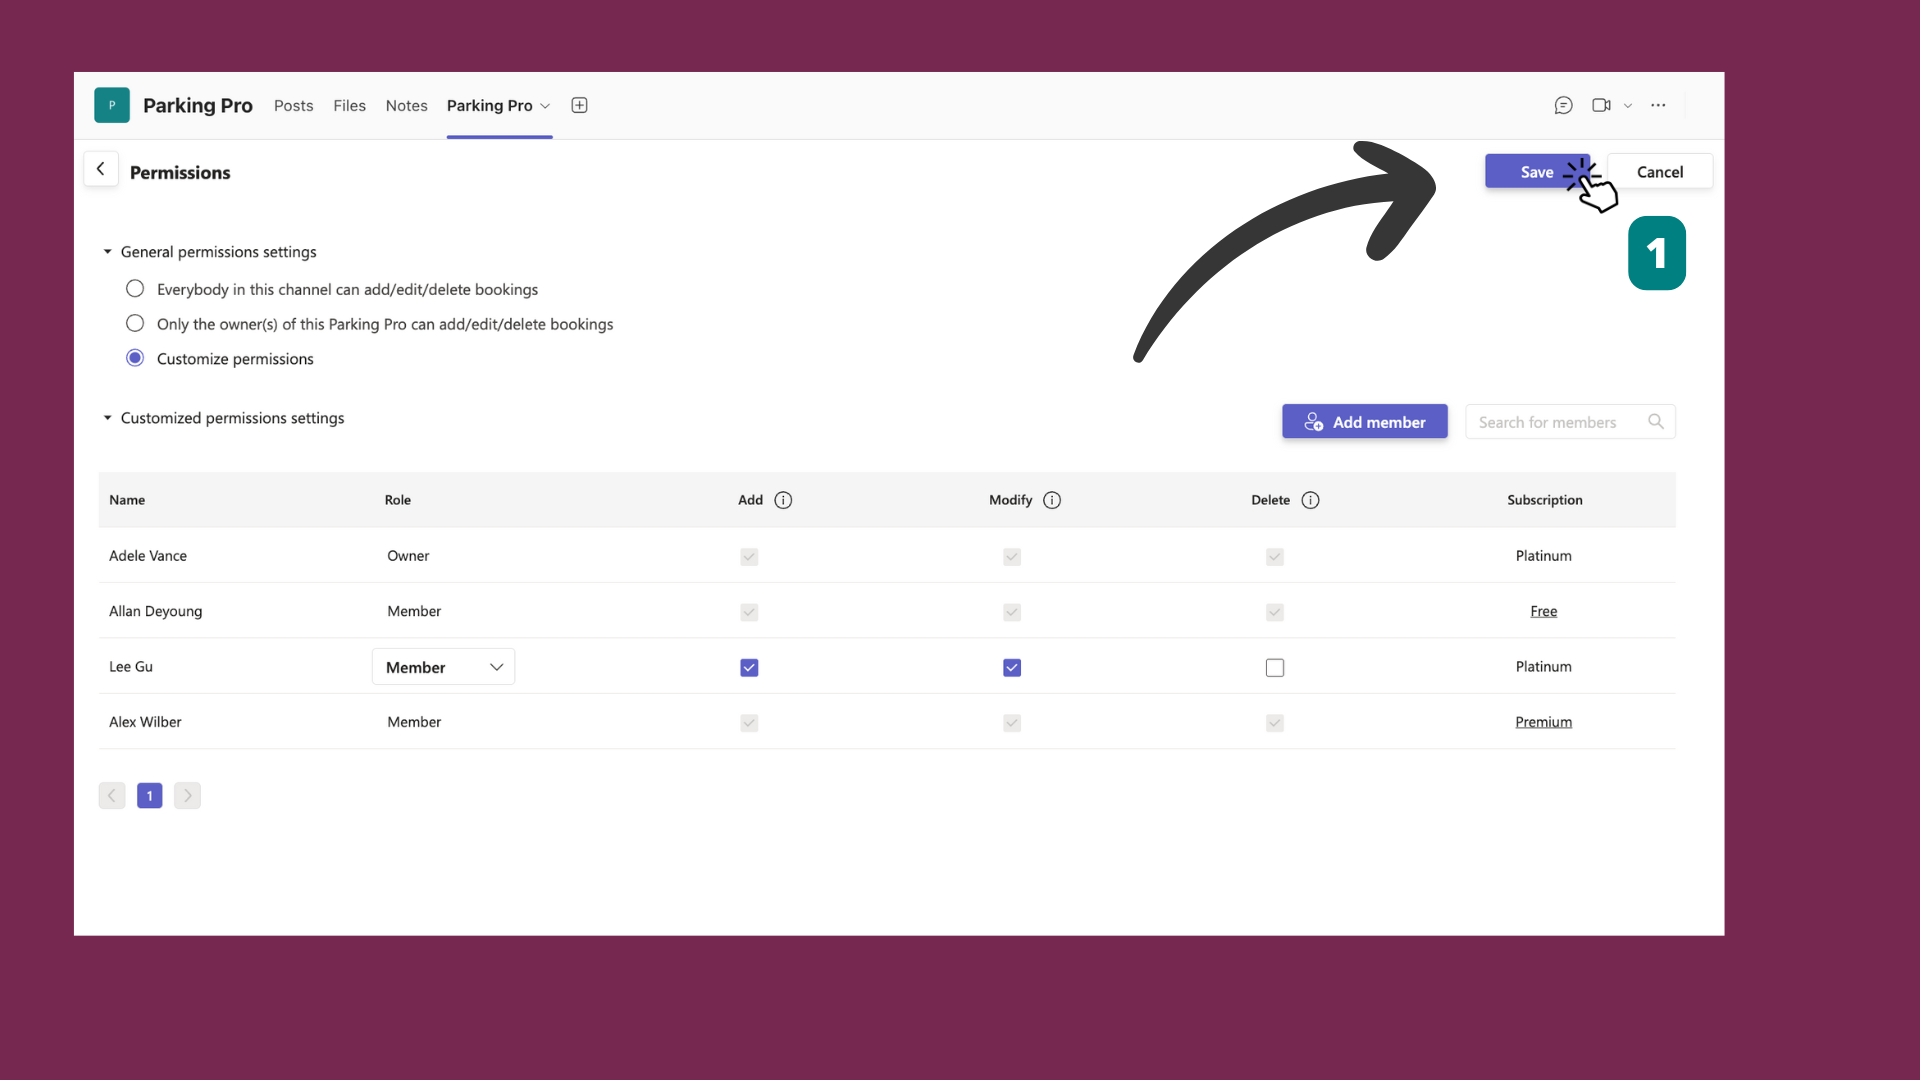
- In the permissions dialog, you will see the "General permissions settings" section.
- Choose one of the following options:
- Everybody in this channel can add/edit/delete bookings: Allows all members to manage bookings.
- Only the owner(s) of this Parking Pro can add/edit/delete bookings: Restricts booking management to Parking owners only.
- Customize permissions: Allows you to set specific permissions for each member.
# Customizing Permissions
Customize Permissions:
- Select the "Customize permissions" option to enable individual permissions settings.
- In the "Customized permissions settings" section, you can manage permissions for each member.
Add Member:
- Click on the "Add member" button to add new members to the permissions list.
- Use the search bar to find and add members.
Set Individual Permissions:
- For each member, set the following permissions by checking the appropriate boxes:
- Add: Allows the member to add bookings.
- Modify: Allows the member to modify bookings.
- Delete: Allows the member to delete bookings.
- You can also view the member's subscription level (e.g., Platinum).
- For each member, set the following permissions by checking the appropriate boxes:
Save Permissions:
- After setting the desired permissions, click on the "Save" button to apply the changes.

# Managing Permissions Tips
- Review Regularly: Regularly review permissions to ensure they align with team roles and responsibilities.
- Limit Access: Restrict permissions to essential personnel to maintain control over the Parking.
- Clear Roles: Clearly define roles and communicate them to your team to avoid any confusion.
