
# Set up Parking Pro
Parking Pro lets your team book and manage parking places directly inside Microsoft Teams. This guide walks you through adding Parking Pro to a channel, adding your parking places, personalizing the view, setting who can manage bookings, and creating tags so reservations stay organized. 🅿️
Everyone in the channel can view and use Parking Pro. The free plan includes up to 3 parking places and unlimited single reservations; Parking Pro Premium adds unlimited places, recurring reservations, tags, and geolocation.
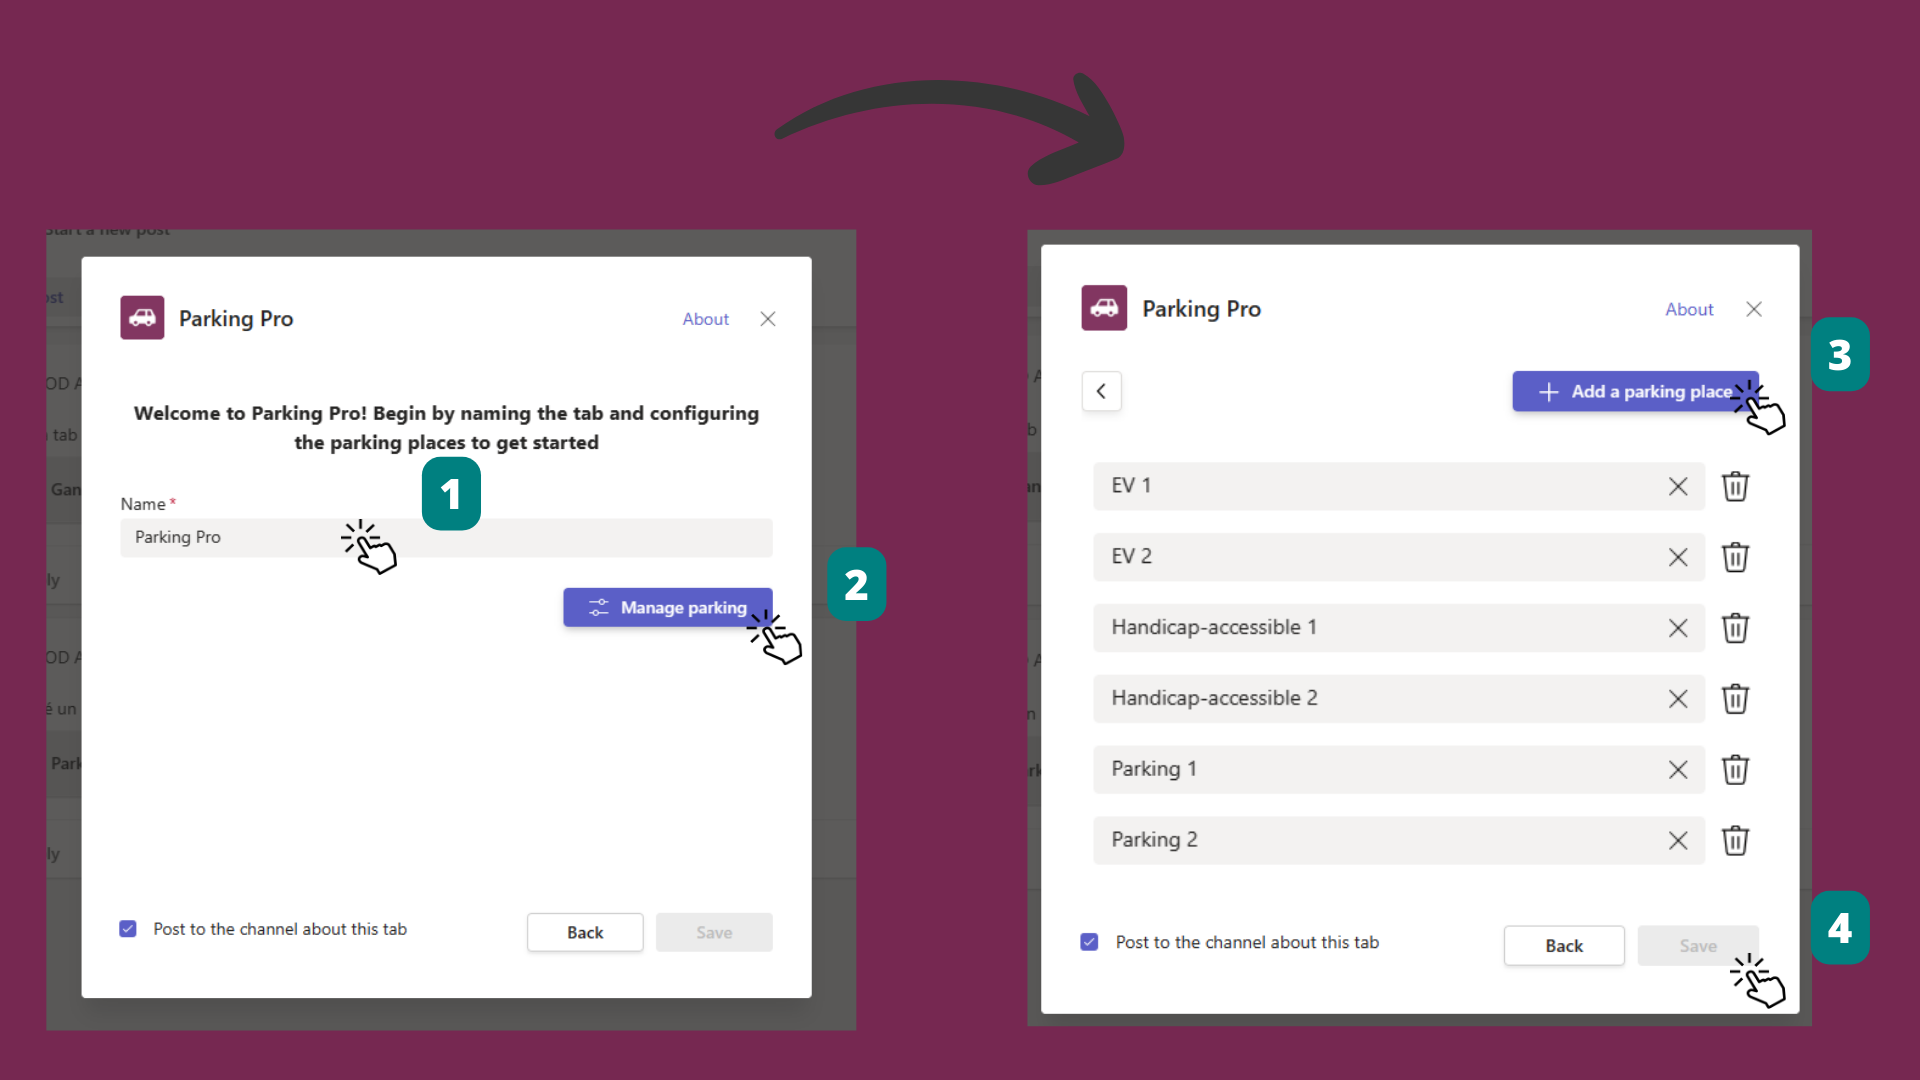
# Add Parking Pro and your places
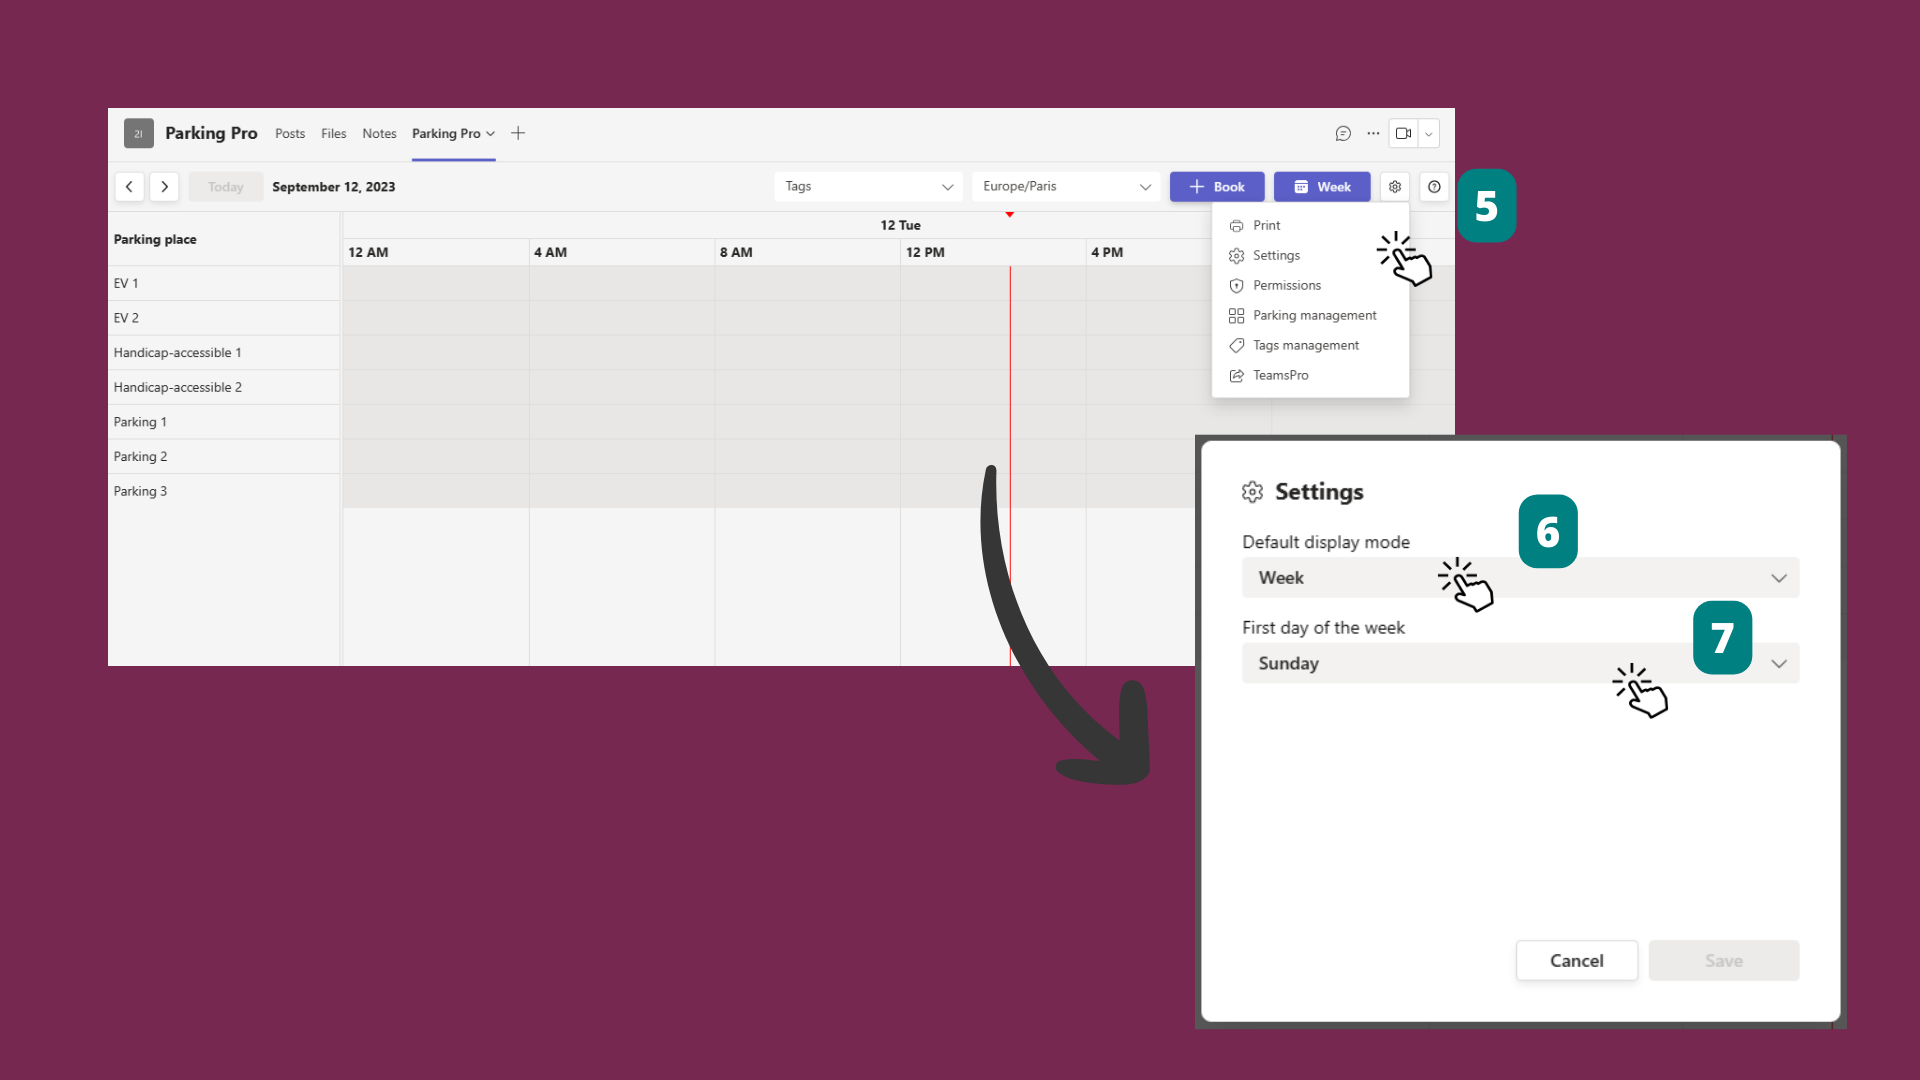
# Personalize the display
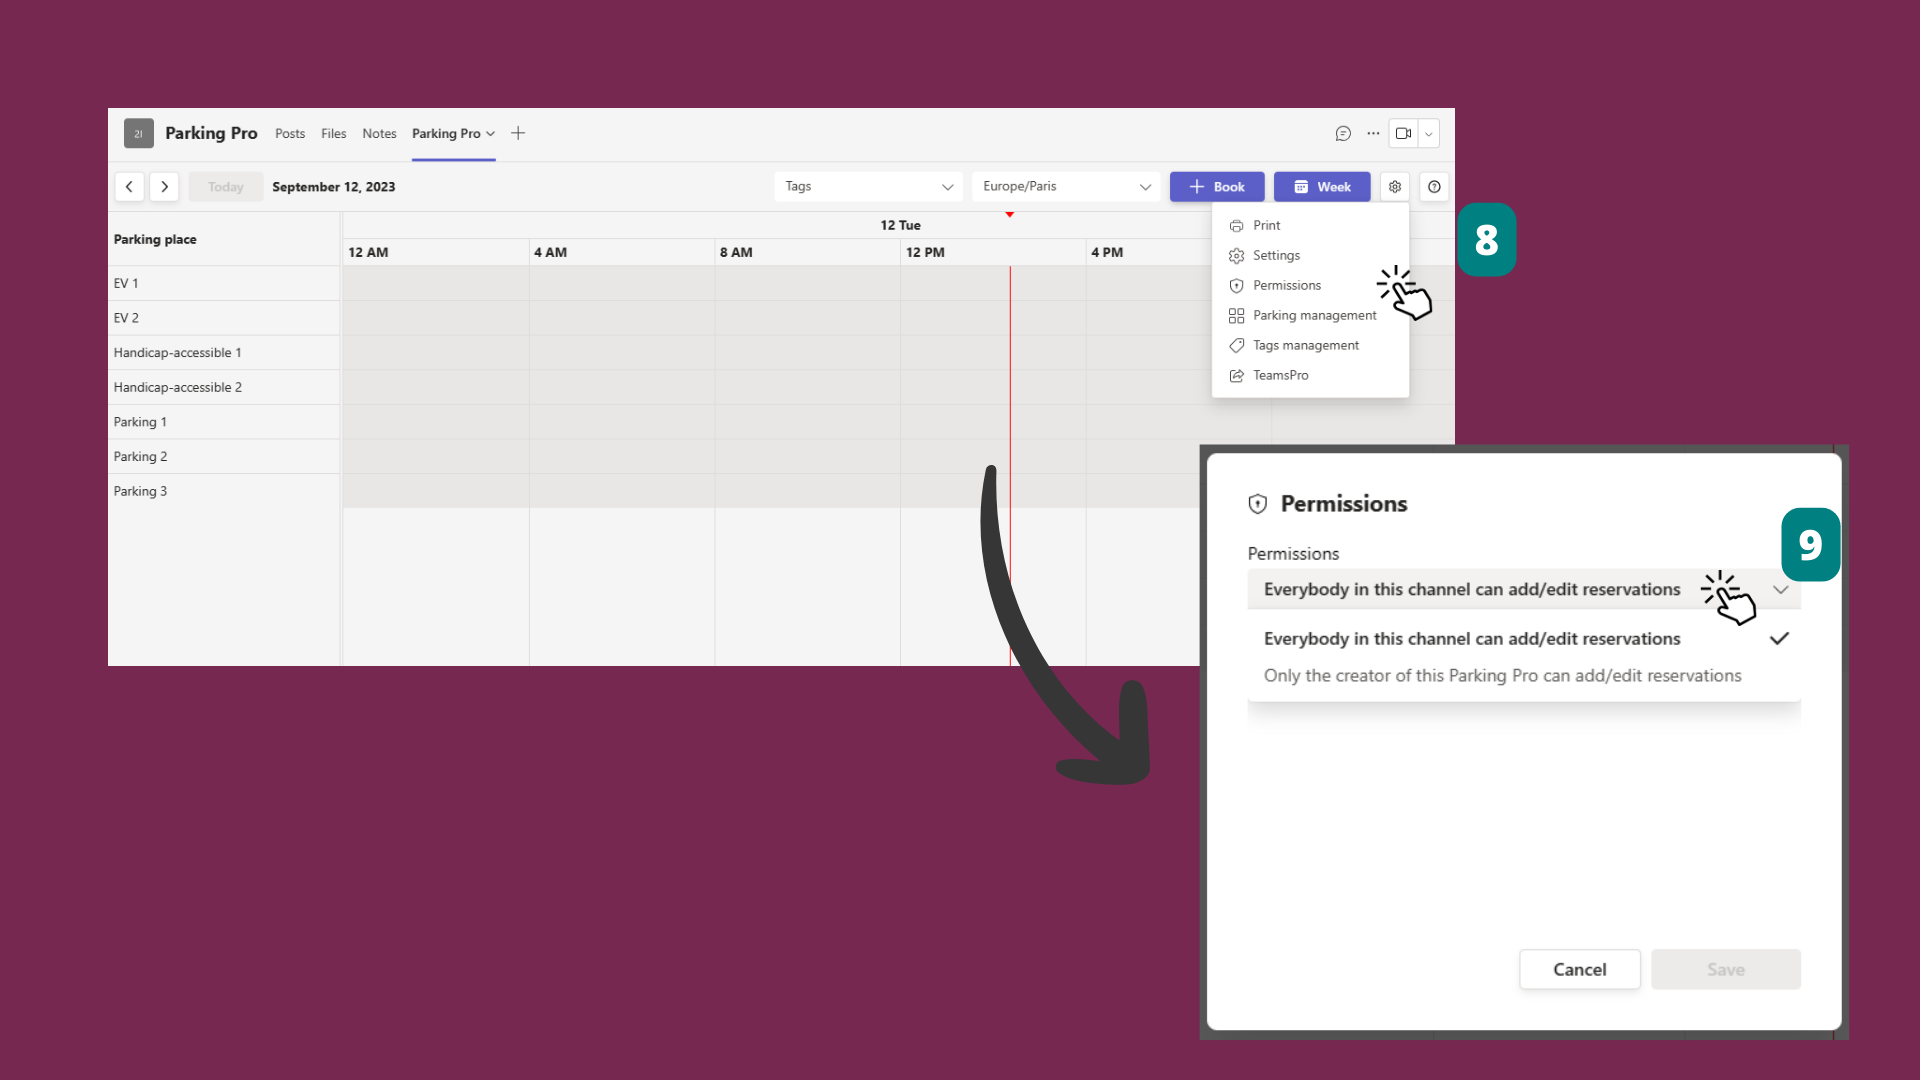
# Set booking permissions
# Create tags
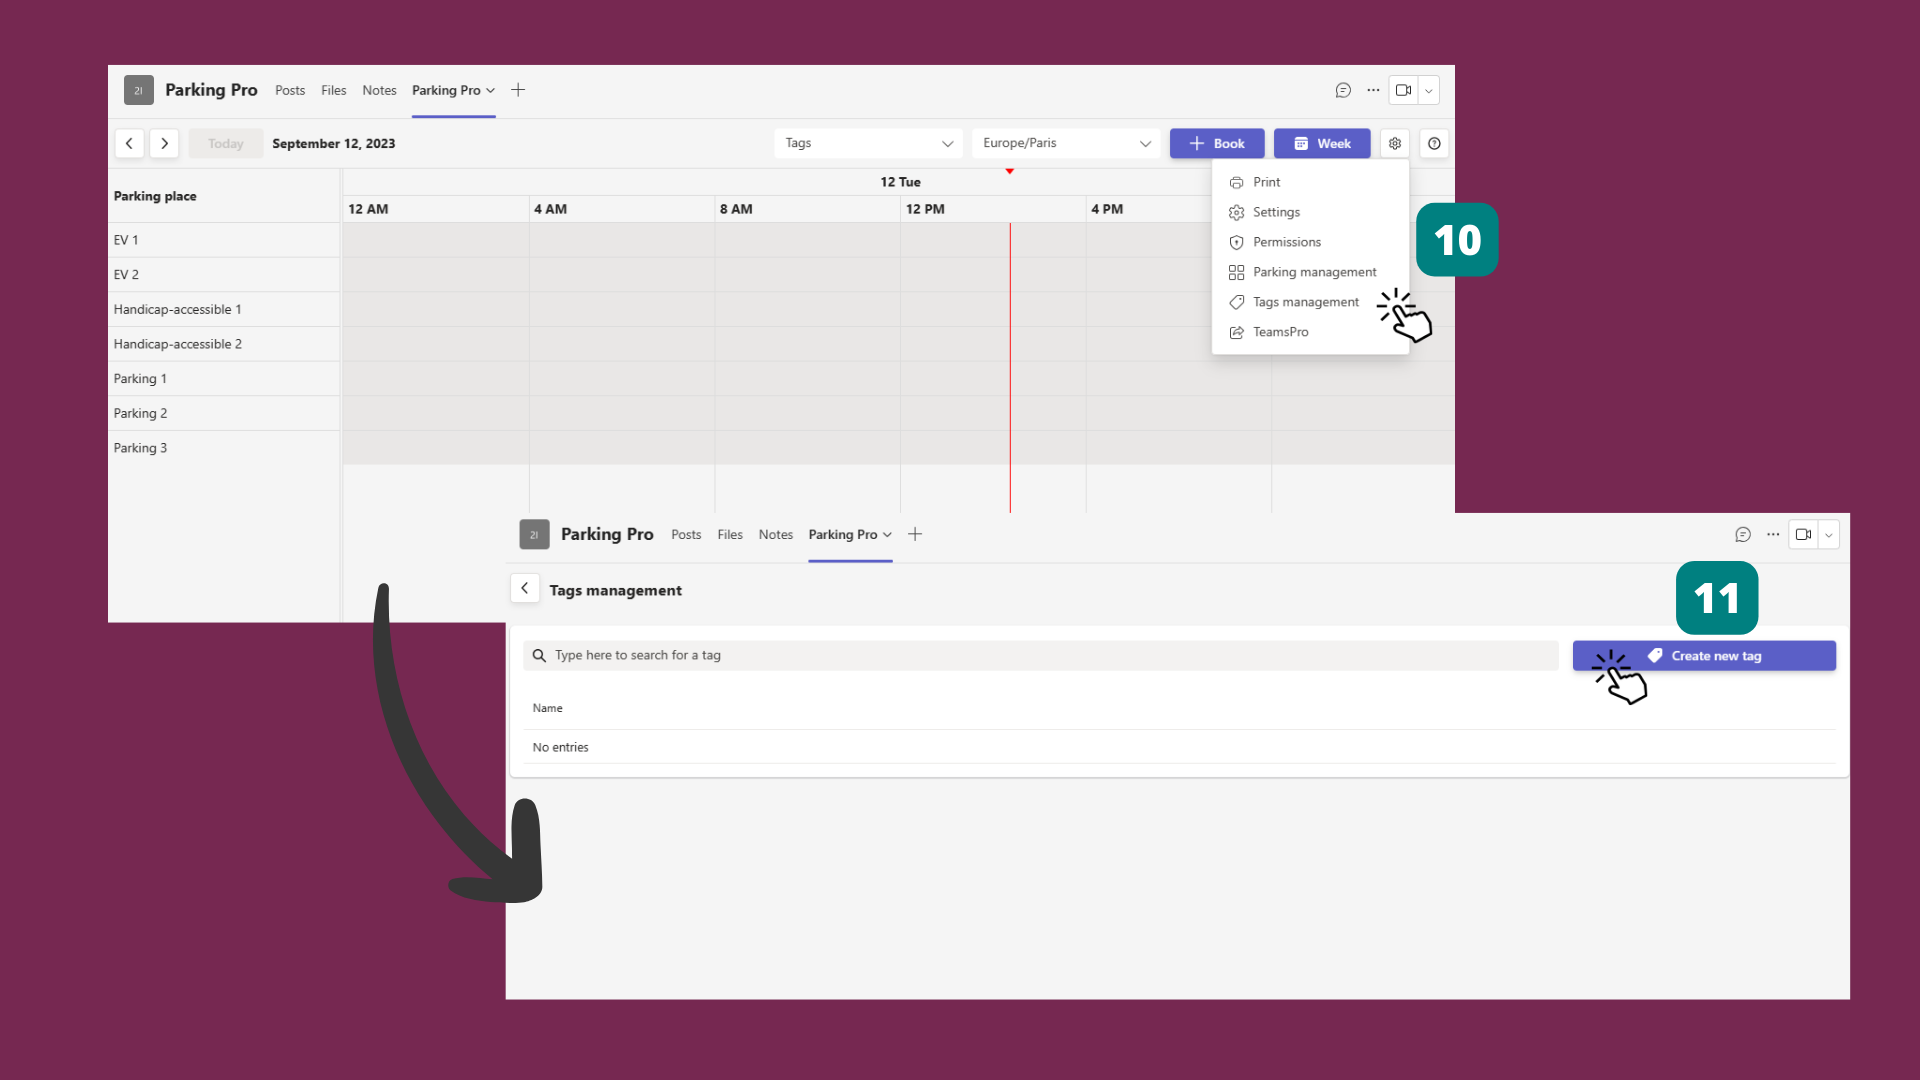
Tags let members filter the parking view and label each reservation by type, which makes busy parking lots much easier to manage.