
# Tags in Booking Room Pro
Tags let you categorize Booking Room Pro reservations by type, then filter the booking view to show only what matters to you. For example, Contoso manages meeting rooms across several office locations and tags each reservation as Employee, Guest, or Executive so teams can tell the bookings apart at a glance.
# Create and manage tags
Create, rename, and delete tags in one place so your tag list stays clean and consistent across every booking.
- 1
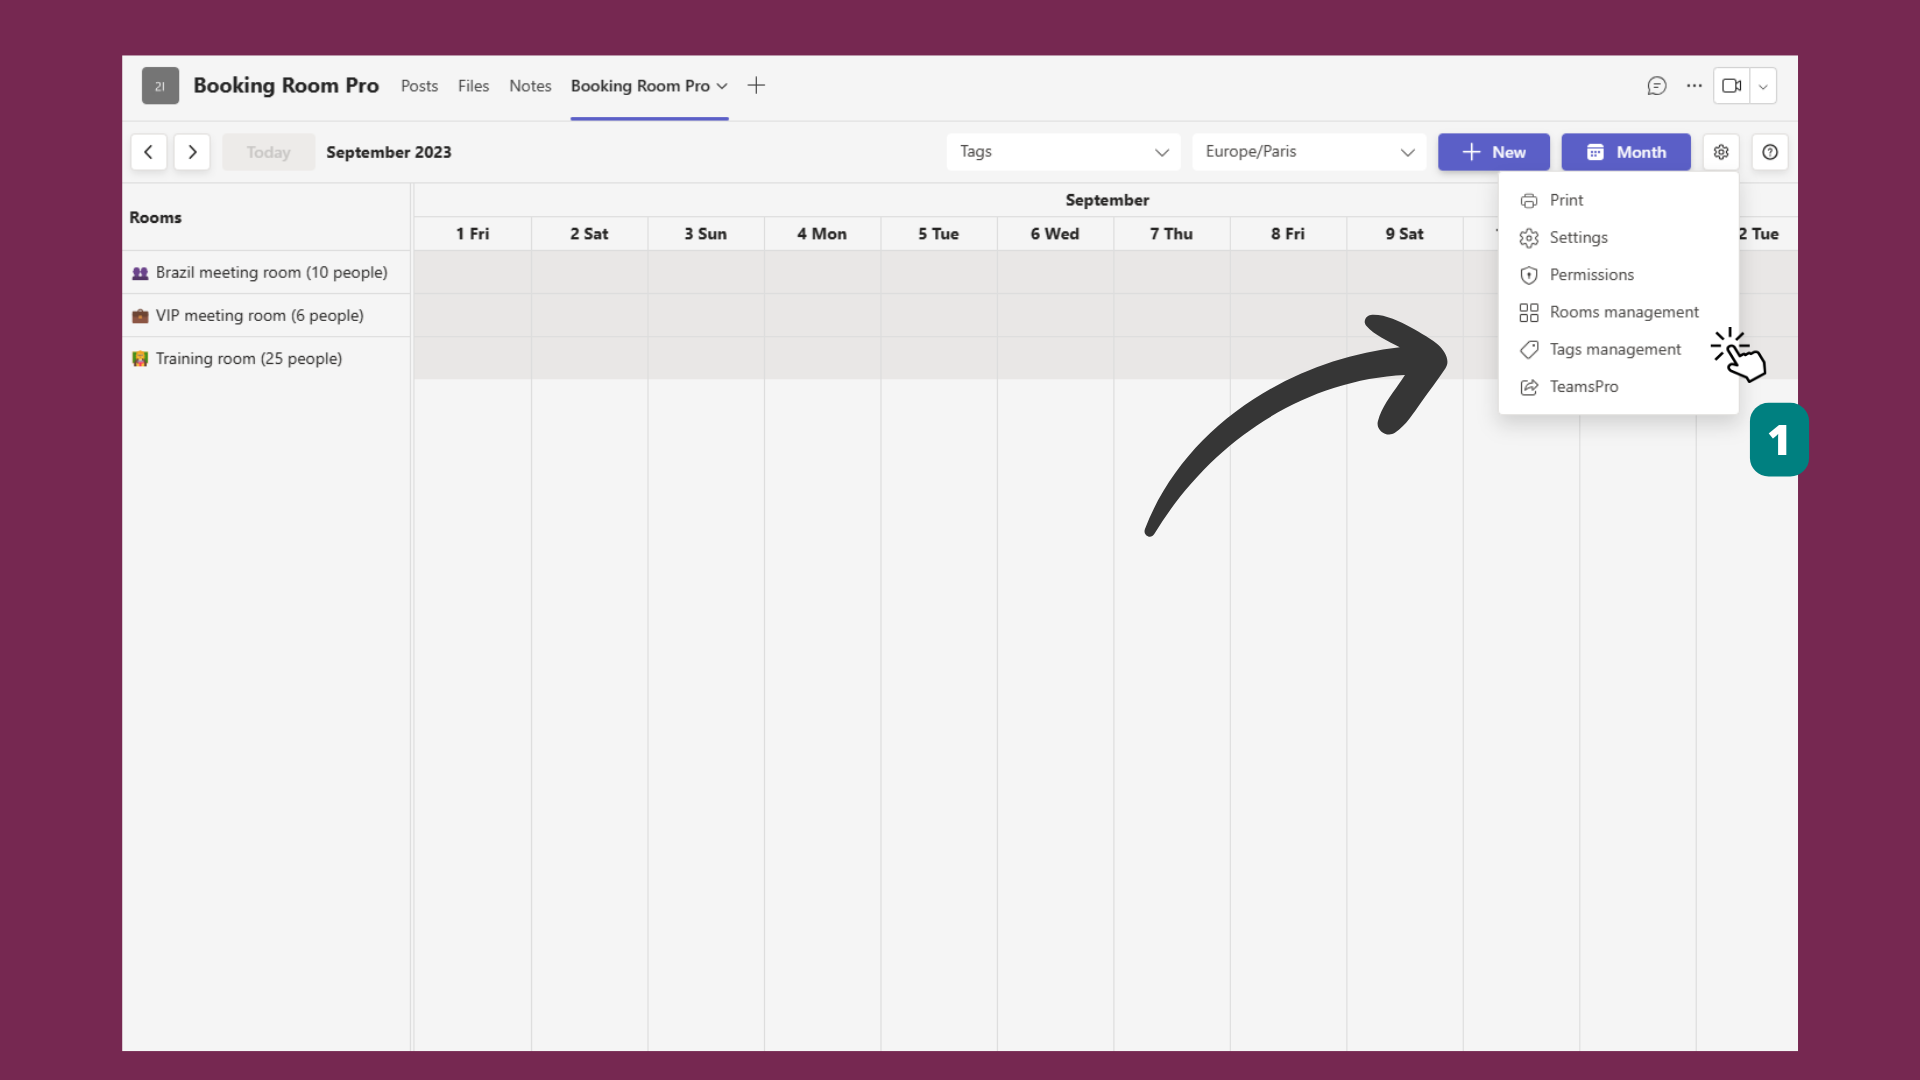
Click the Settings gear next to the Week button, then select Tag management.
- 2
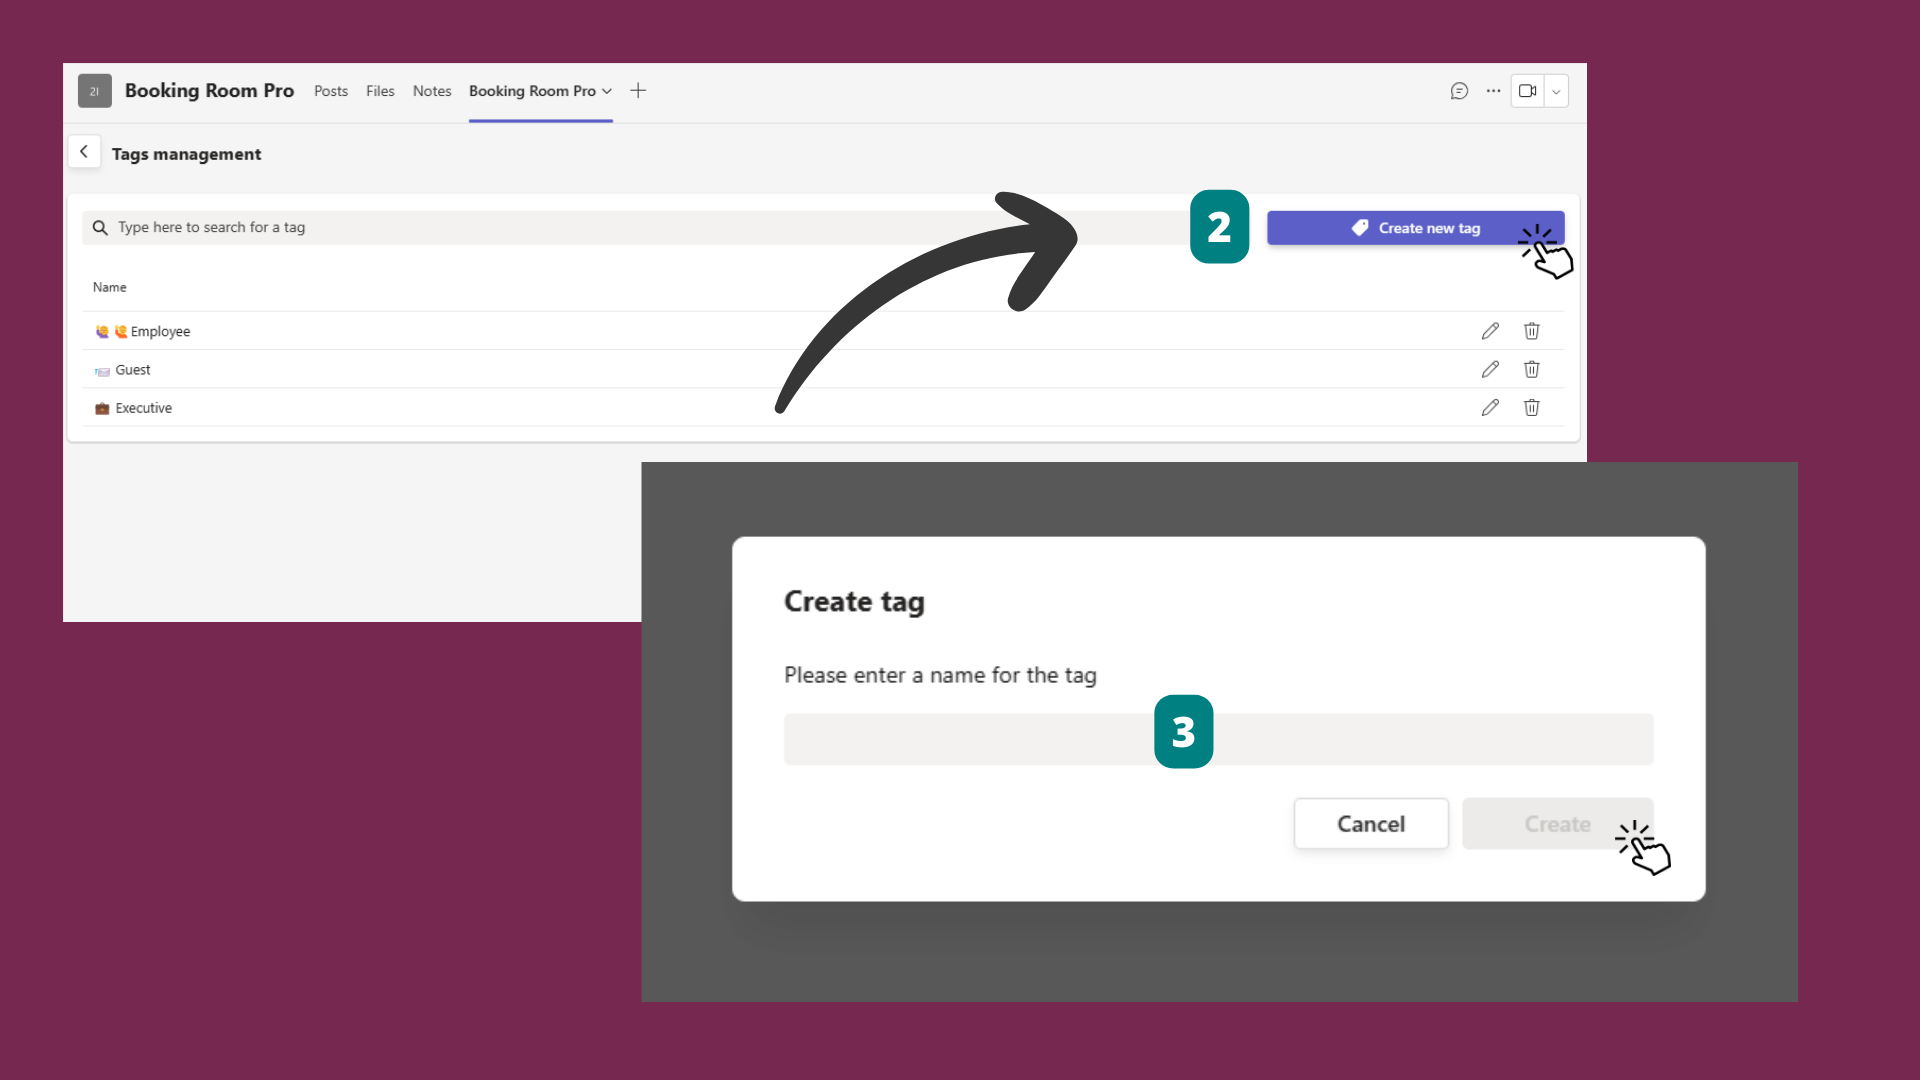
To create a tag, click Create new tag, enter a name, and click Create.
- 3
To rename a tag, select it in the list, choose Edit, update the name, then click Save.
- 4
To remove a tag, select it and choose Delete.
Deleting a tag permanently removes it from every booking it was applied to.
# Filter the booking view by tag
Once your bookings are tagged, narrow the view to one or more tags to find the reservations you need fast.
- 1
Open the booking view in Booking Room Pro.
- 2
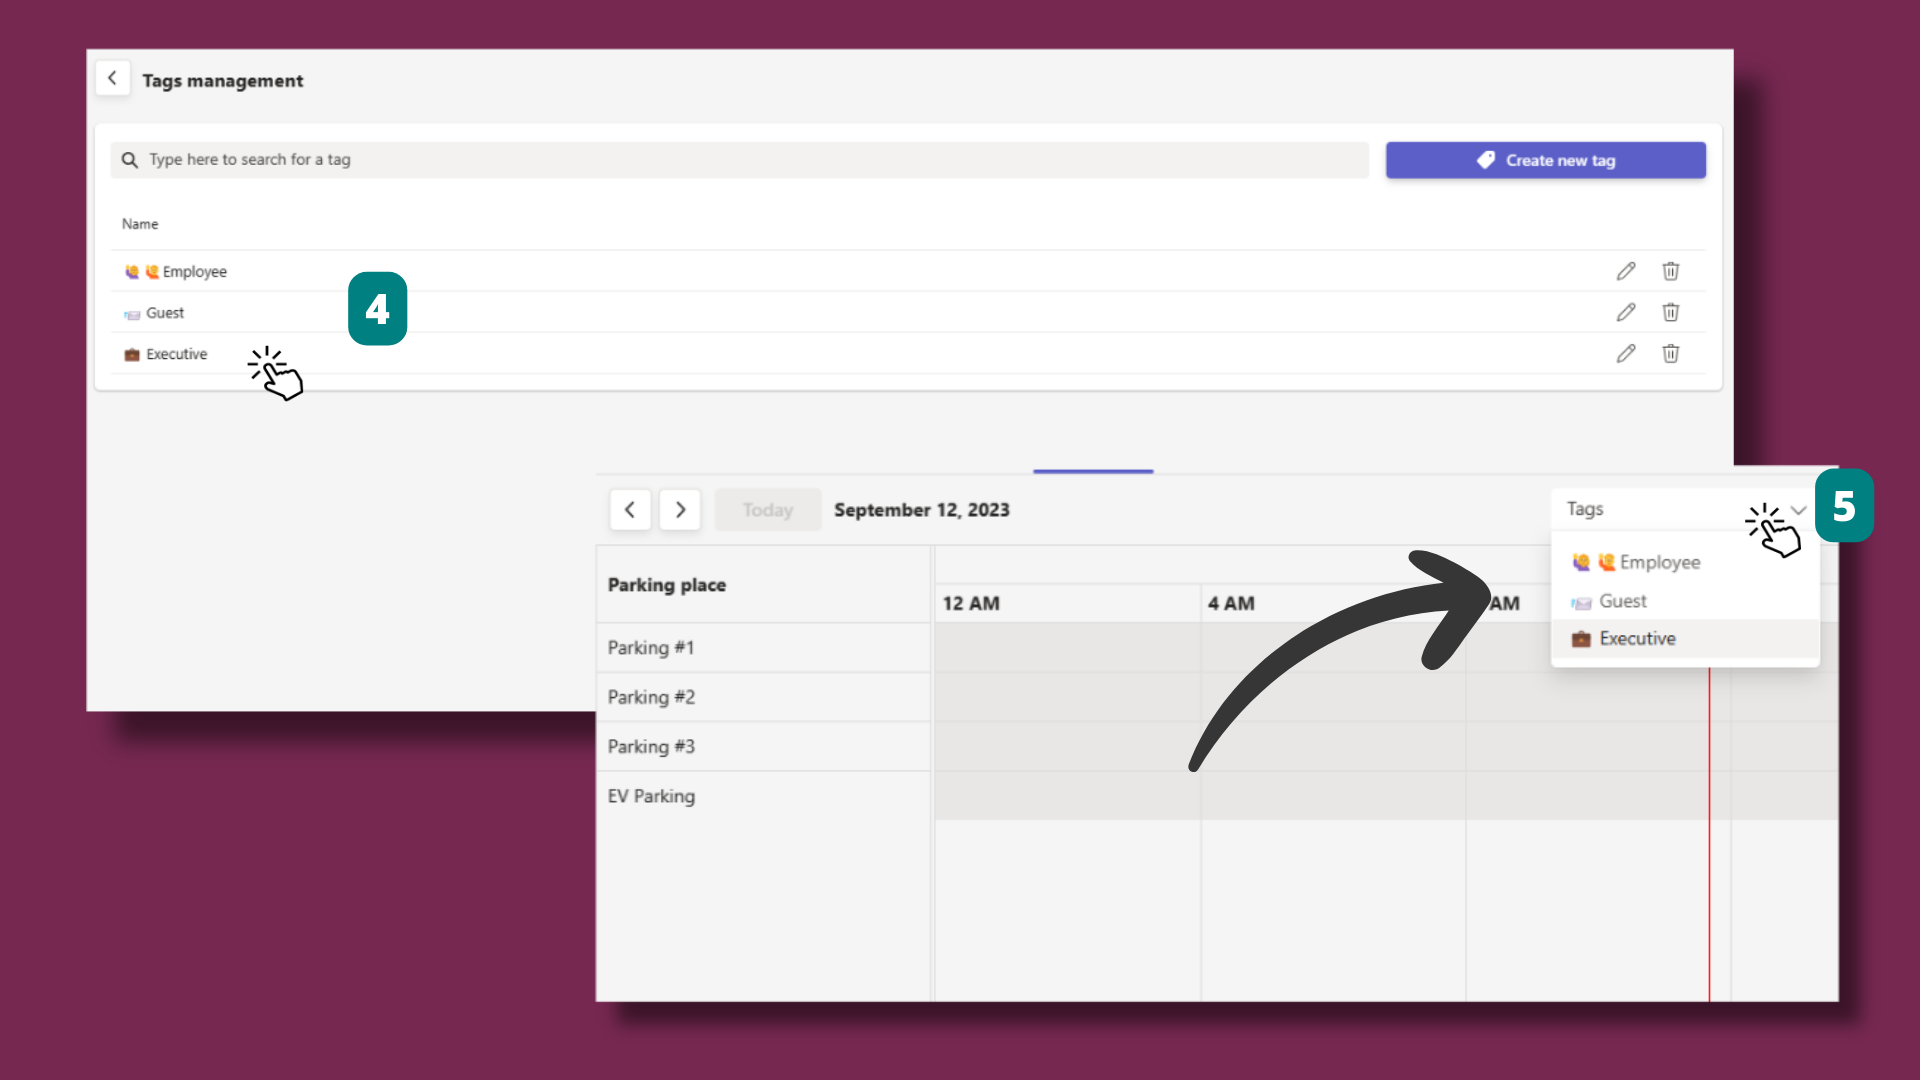
In the Tag filter at the top, select one or more tags.
The view now shows only the bookings that carry the selected tags. Clear the filter to see everything again.
# Tag a booking
Apply a tag while you book a room so the reservation is categorized as you create it.
- 1
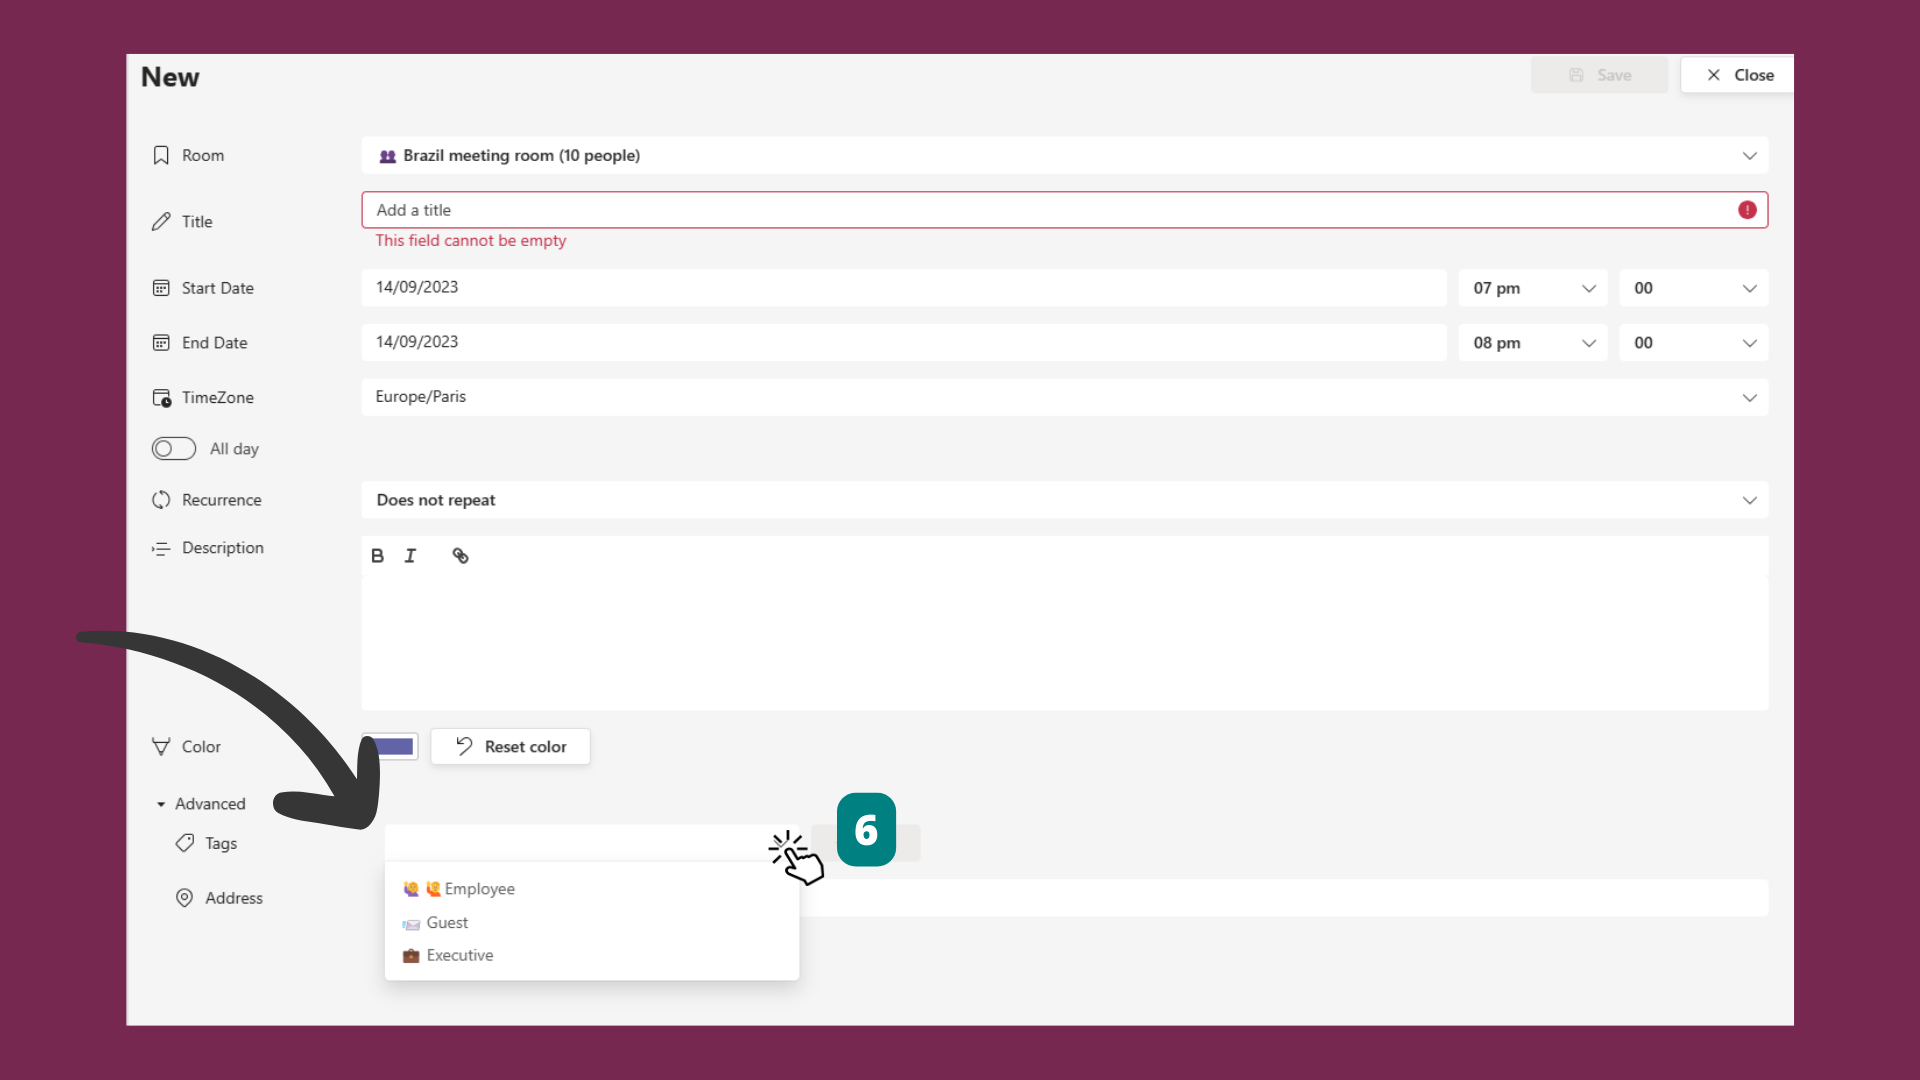
Open or create a booking to display the booking form.
- 2
Select the tag that matches the reservation type, then save the booking.
# Related pages
- Learn how to reserve a room in how to add an event.
- Change the calendar layout in changing the view and first day of the week.
- Compare plans and unlock tags on the Premium vs Free comparison.