
# Upload an image to Image Pro
Image Pro lets you bring an image into Microsoft Teams and edit it without leaving the app. The first step is uploading a picture, either from your own computer or from a file already stored in your team SharePoint library. Once the image loads, it opens in the built-in editor so you can start making changes right away.
# Upload an image
- 1
Open the Image Pro tab
- In Microsoft Teams, open the channel where Image Pro was added, then select the Image Pro tab.
- If no image is set yet, the welcome screen appears with two upload options.
- 2
Choose where to upload from
- Click Upload from this device to pick a file from your computer.
- Or click Attach cloud file to browse and select an image from your team SharePoint library.
Image Pro accepts PNG and JPEG image files.
- 3
Open the image in the editor
- Select your file. Image Pro loads it into the built-in editor, ready for you to start editing.
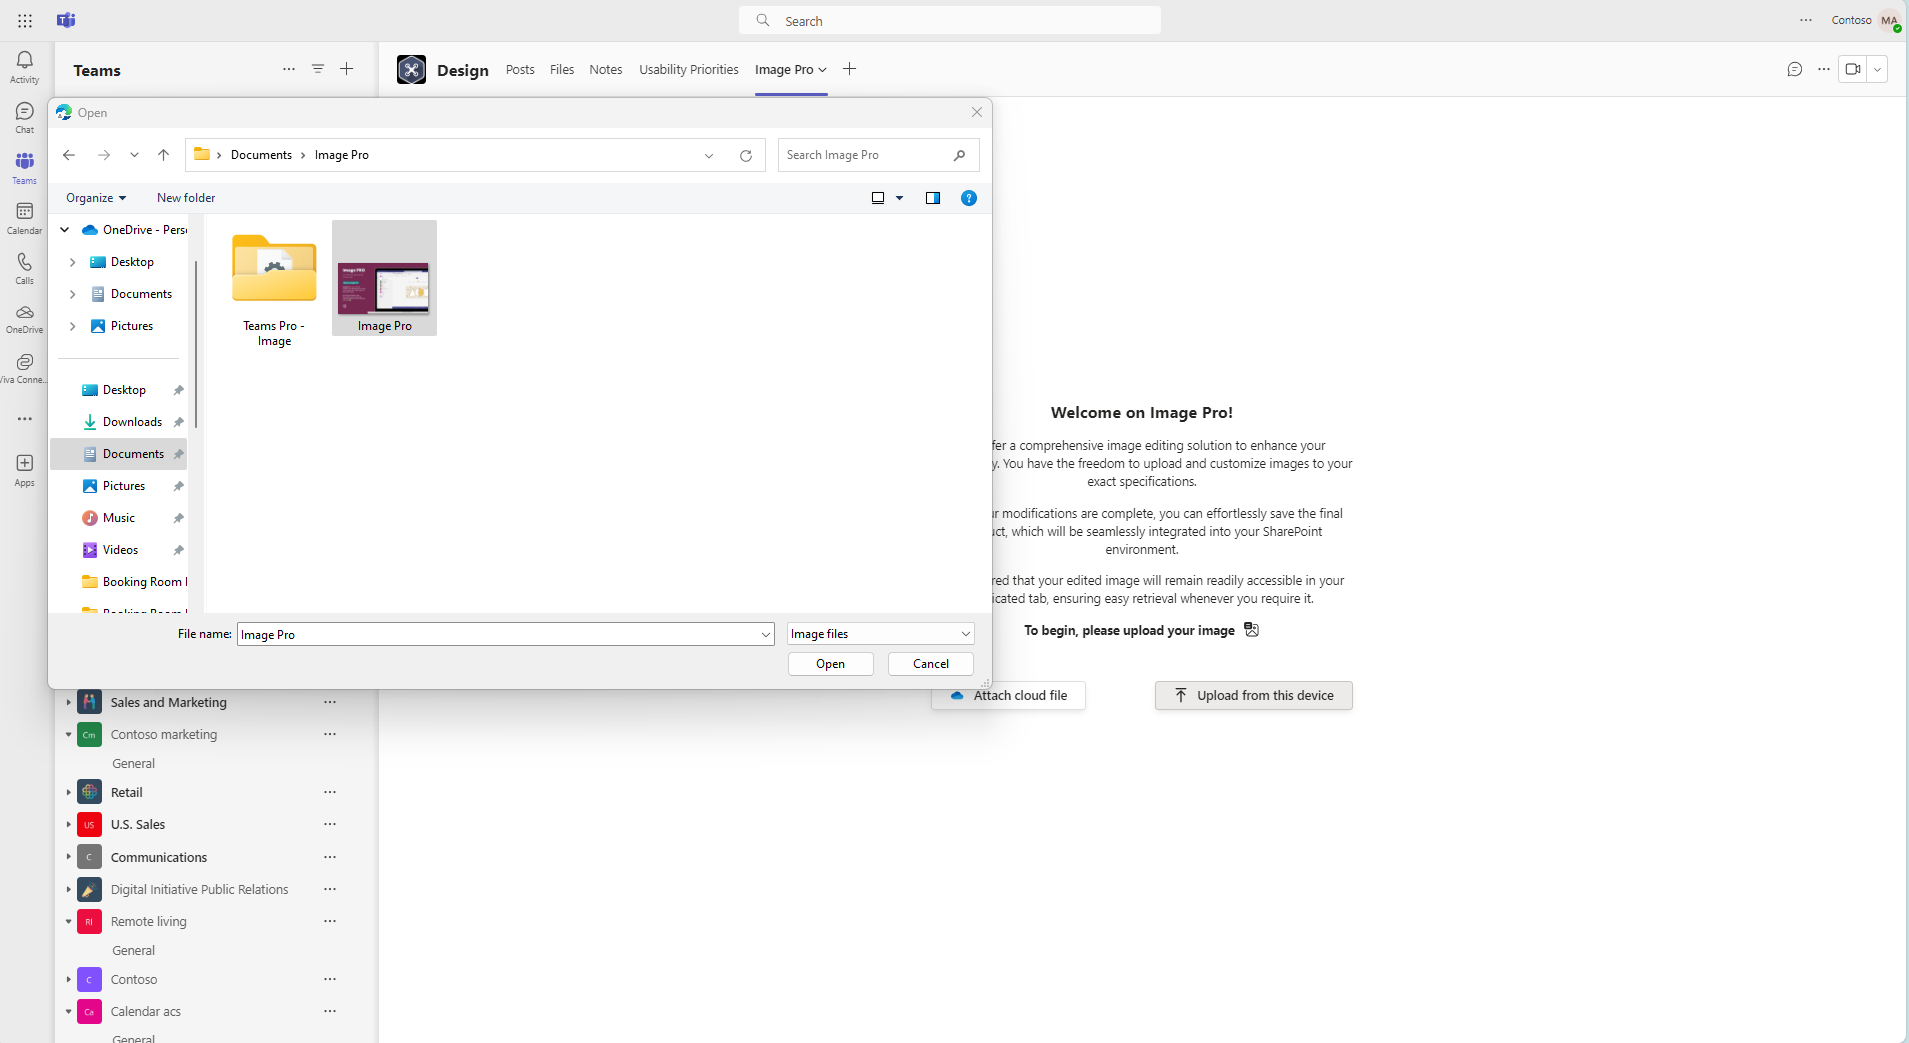
Image Pro accepts PNG and JPEG files. You can swap the current image at any time using the same Attach cloud file or Upload from this device buttons in the editor toolbar.